Ethernet 241 Deployment
This document details how to deploy Ethernet 241 hardware to secure your printer fleet with Secure Release.
Topics in this document:
Overview
Pharos Cloud offers compatibility with the rf IDEAS® Ethernet 241 device, providing seamless integration for Secure Release, much like the SR25 hardware. Ethernet 241 is a compact device that connects to a printer and an external card reader, facilitating Secure Release. When a user submits a document, it remains in a queue until the user authenticates at a secured printer to release the document, improving document security and confidentiality.
Here’s how it works:
- A user submits a print job to the Pharos Secure Printer.
- The user walks to any secured printer and holds their proximity card over the reader to authenticate.
- When the user is successfully authenticated, the Ethernet 241 hardware releases all print jobs belonging to that user.
Deploying Ethernet 241 Hardware Devices
Here’s what you’ll need to successfully deploy Ethernet 241 hardware to the relevant printers in your environment:
- The Ethernet 241 hardware kit
- A proximity card reader
- A printer, powered on and connected to the network
Step 1: Connect the Ethernet 241 hardware to a printer and a card reader
- Connect the Ethernet 241 Network port to your network.
- Connect the Ethernet 241 Device network port to your printer.
- Plug the proximity card reader into the USB port of the Ethernet 241.
- Connect the power cable to the Ethernet 241 and plug it into a power outlet. The solid green LED status indicates that the Ethernet 241 is powered on.
Step 2: Download the Discovery and Deployment Utility (DDU)
The Discovery and Deployment Utility (DDU) is required to configure Ethernet 241 devices. Download the DDU v1.34.1 or a more recent version if it’s not already downloaded. The DDU used to discover printers including Ethernet 241 devices on your network. It is also used to secure your printer connected to an Ethernet 241 hardware.
The DDU is the only way to secure a printer with Ethernet 241 hardware. To secure printers for mobile release or on-screen options, use the web console (Secure > Secure Printers screen).
Before you begin:
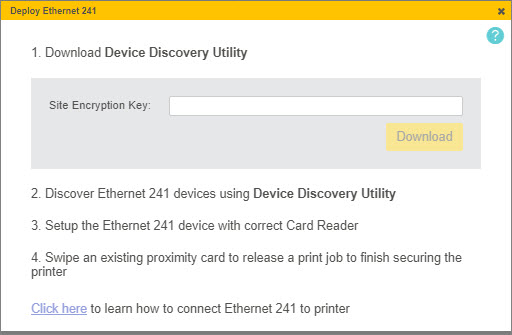
Make sure you have your Site Encryption Key. You can get this from the Secure > Setup Guide > Install on-premises components.
To download the DDU :
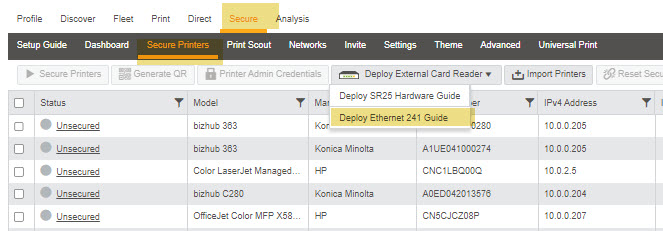
- In the web console , navigate to the Secure > Secure Printers tab.
- Select Deploy External Card Reader > Deploy Ethernet 241 Guide option.
- In the dialog box that appears, enter the Site Encryption Key for your site to download the DDU.
Alternatively, you can also download the DDU from the Secure > Setup Guide screen (under Secure Printers with External Card Reader).
Step 3: Install the DDU
- Run the DDU on any workstation that has a line of sight to the Ethernet 241devices that you wish to discover.
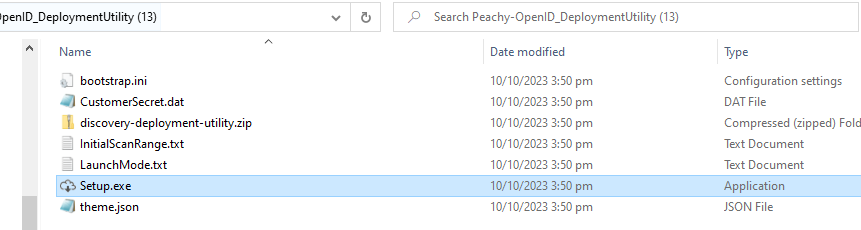
- Copy the downloaded DDU zip file and extract the file.
- A new window opens showing the Setup application files. Run Setup.exe.
- Double click on the discovery-deployment-utility shortcut to open the DDU.

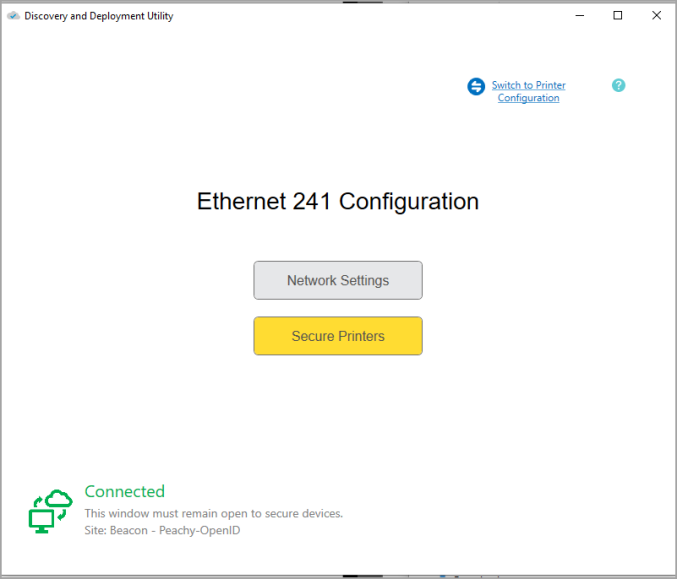
- This opens the DDU Ethernet 241 user interface.
Step 4: Secure your printer
a. Select the Network Settings option.
b. In the dialog box that appears, add the IP addresses of the Ethernet 241 hardware that you want to discover and then click Add.
c. Save changes.
The initial scan range is taken from the network address information in the Secure Setup Guide. You can manually enter the IP ranges of the Ethernet devices that you want to scan in the Network Ranges tab of the DDU.
c. Once you’ve entered the IP addresses of the Ethernet 241 devices you want to scan, you are now ready to secure the printers.
In the Ethernet 241 Configuration user interface, select the Secure Printers option.
d. In the dialog box that appears, click Scan for DDU to initiate discovery for Ethernet 241 devices. The DDU will use the IP address details specified in the Network Settings > Network Ranges section of the DDU to discover Ethernet 241 devices.
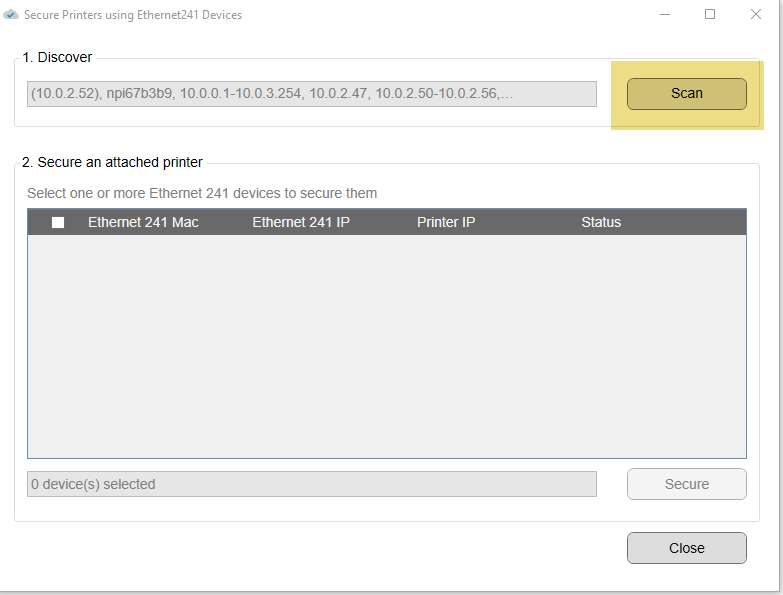
- If no IP address range is provided, the DDU will automatically detect the subnet that the DDU is running on and scan that.
- The IP range(s) defined in the DDU takes precedence over the ones defined in the web console.
All discovered Ethernet 241 devices are displayed in the user interface as shown in the image below. It also shows the IP addresses for printers connected to any of the Ethernet 241 devices.
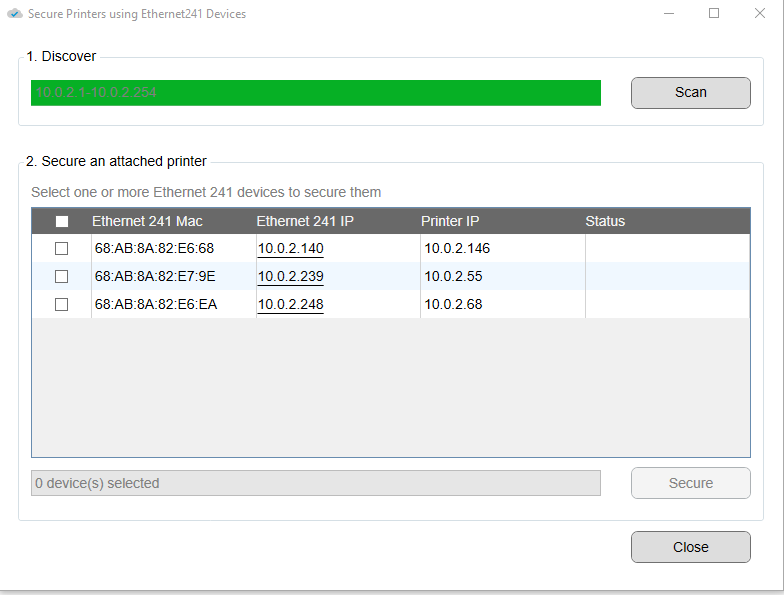
e. Select the printer that you want to secure.
Click Secure. This process takes about a minute. When the Ethernet 241 is successfully secured, the Status column in the DDU will show Secured.
In the web console (Secure > Secure Printers screen), the Status of the printer connected to the Ethernet 241 will also be updated to "Secured."
e. Your printer is now secured with the Ethernet 241 device. A solid green light on the LED system status indicates that all connections are established, and the printer is ready for use.
Troubleshooting Tips
- If the Printer IP column remains empty after scanning, it indicates issues with cable connections. Please verify that the Ethernet 241 device is connected to the correct port on the printer.
- If you encounter issues securing printers with the Ethernet 241 device, check the logs in two locations:
- In the DDU application folder, navigate to the location where DDU is running, for example, C:\Users\user1\Downloads\user1-OpenId_DeploymentUtility\discovery-deployment-utility\log.txt.
- Access Ethernet 241 device logs by clicking on the IP address of the Ethernet 241 device in DDU, which will redirect you to the device's webpage. Then, click on the "Logs" tab to view the device's logs.
- If the card swipe function is not working, please ensure that the card reader and the card being used are compatible. When a compatible card is swiped, a green LED flash on the reader indicates compatibility. If the green light does not flash when the card is swiped, it means the card and reader are not compatible.