Driver Capture Tool
Overview
To make print deployment easier, Pharos Cloud is shipped with universal print drivers for various printer manufacturers for Windows. If none of the shipped drivers is suitable for a given device, IT admins can easily add specific print drivers using the Driver Capture tool. The Driver Capture Tool is used to upload drivers as well as setting up related finishing options into the Pharos Cloud so they can be used for print queue deployment.
With the Driver Capture tool, an IT admin can:
- Upload print drivers and finishing options combination
- Add new finishing options for an existing driver
- Modify an existing finishing option
Note: The Driver Capture tool supports adding drivers for Windows only. macOS and Chrome extension are not yet supported.
Supported Driver Types
Pharos Cloud supports uploading of Type 3 and Type 4 drivers. Take note that the Type 4 driver support is in preview mode only.
Supported Type 4 Drivers
Pharos has tested print drivers, primarily universal or generic ones, from the manufacturers listed below, and we anticipate that most other drivers from the same manufacturers should work if they follow the same Type 4 standards and specifications. However, we cannot guarantee that all other drivers will work seamlessly and suggest performing your own testing to ensure compatibility and proper functionality for Type 4 drivers. If a driver doesn’t function as expected, we can work with you to adjust the implementation to support the driver.
-
Canon
-
Konica Minolta
-
Lexmark
-
Ricoh
-
HP
-
Xerox
Pharos has tested with the following drivers:
-
Canon Generic PCL6 V4
-
HP OfficeJet Pro 9020 series PCL-3
-
HP PageWide Color MFP 780-785 PCL6 (V4)
-
HP Smart Universal Print
-
Konica Minolta Universal V4 PCL
-
Lexmark Generic v4 XPS
-
Lexmark Universal v4 XL
-
(Ricoh) PCL6 V4 Driver for Universal Print
-
Xerox VersaLink C500 V4 PCL6
Uploading a new driver and finishing options combination
For organizations that require print drivers that are not available in Pharos Cloud driver store, there is an option to upload device-specific print drivers as well as related finishing options to Pharos Cloud.
Before uploading a new driver:
- You will need to first install the print driver software that you want to upload to Pharos Cloud on a user workstation with the Print Scout installed.
- You will need to open the Pharos Cloud web console on a Windows machine with the latest Print Scout installed.
Note: Running or launching the Driver Capture tool on a Print Scout installed on a print server is not supported.
-
On a machine where Print Scout is installed, log in to the Pharos Cloud web console.
-
Navigate to the Direct Printer > Direct Printers > Print Queues tab.
-
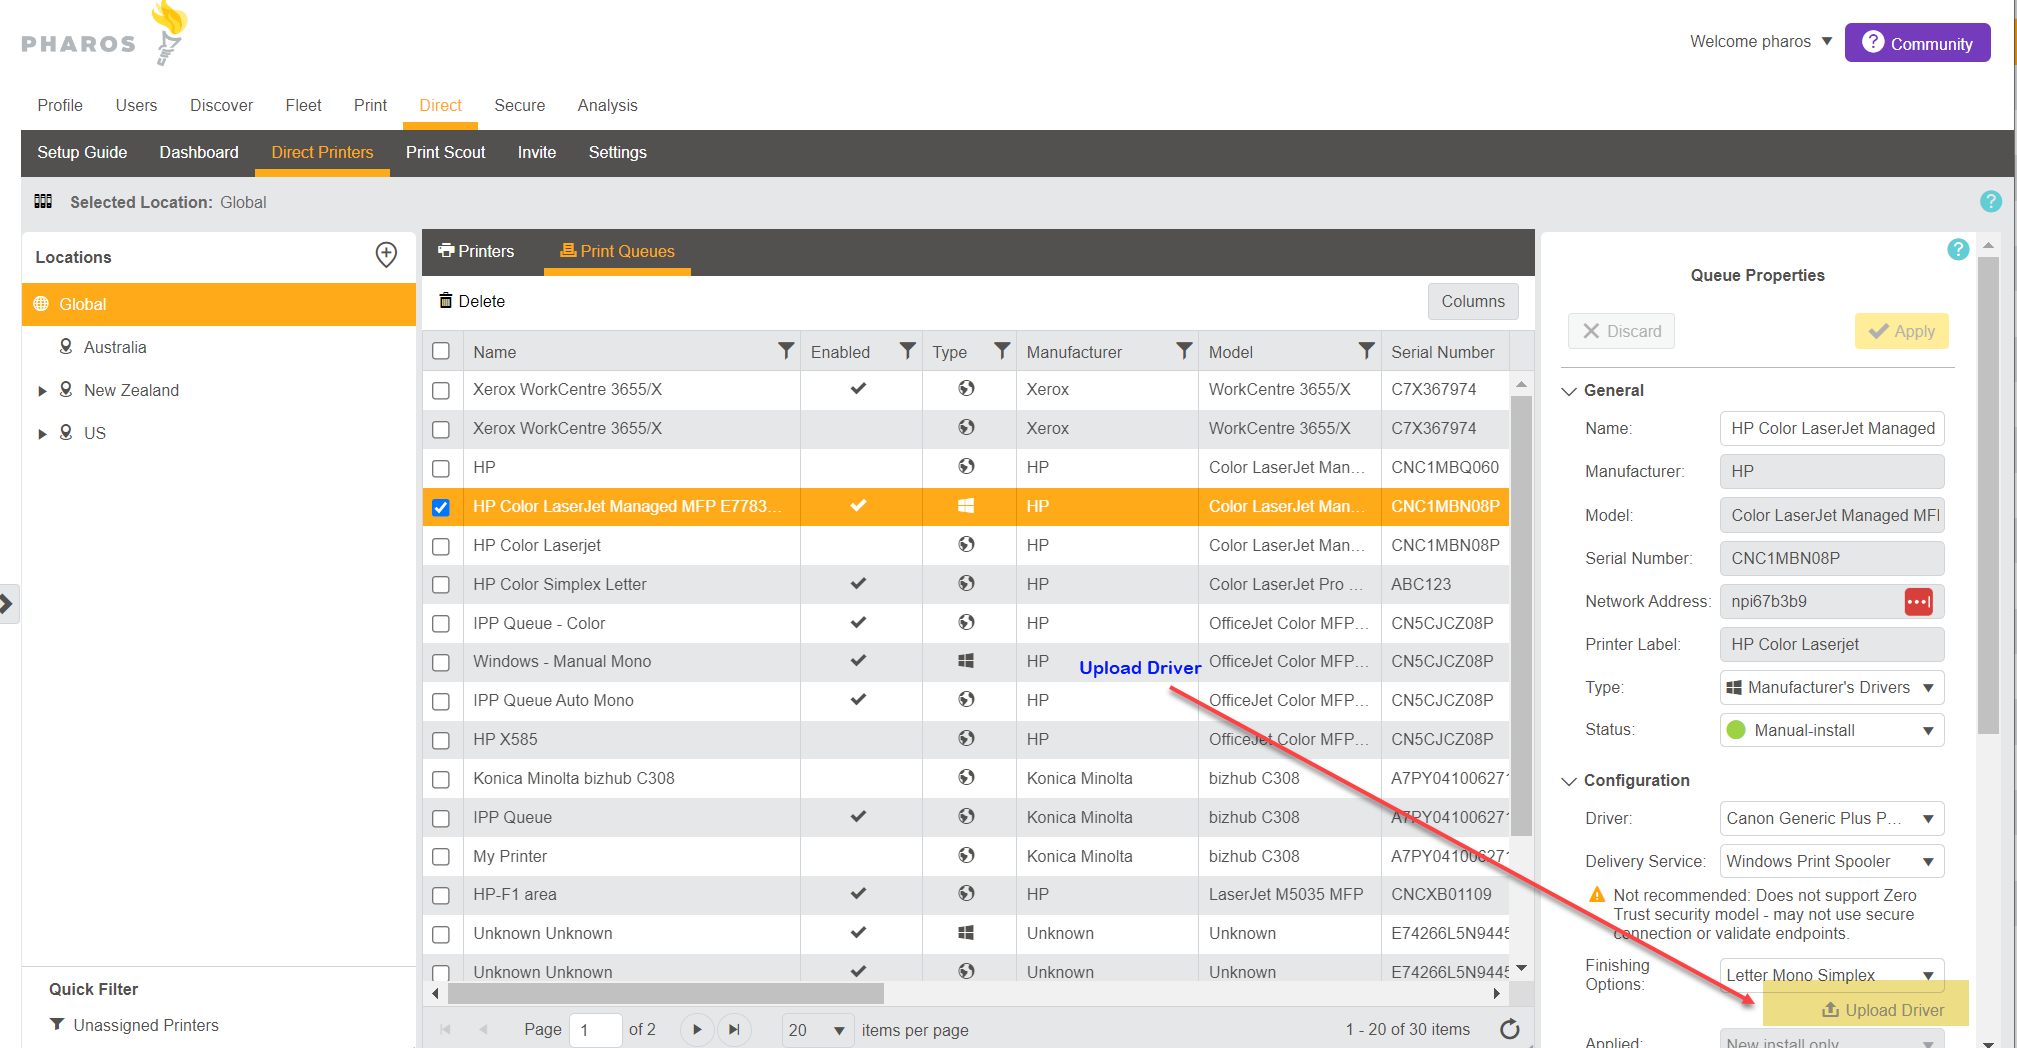
Select any queue from the list and then launch the Driver Capture Tool by selecting the Upload Driver link as shown below.

-
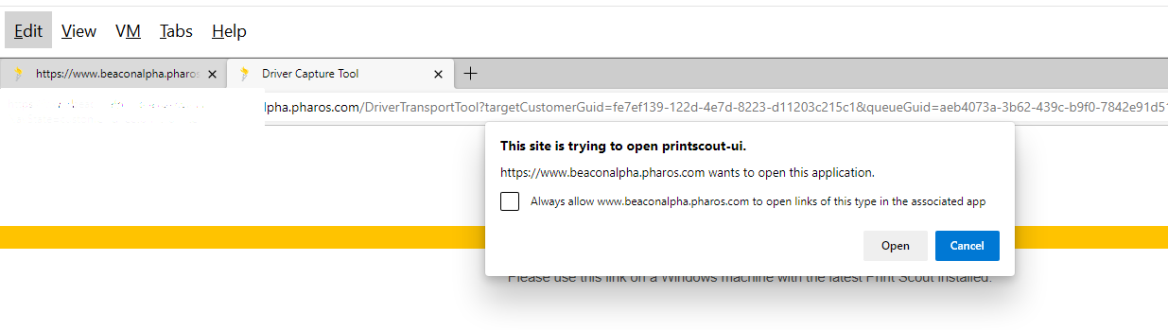
Click the Open button on the dialog box that appears.

-
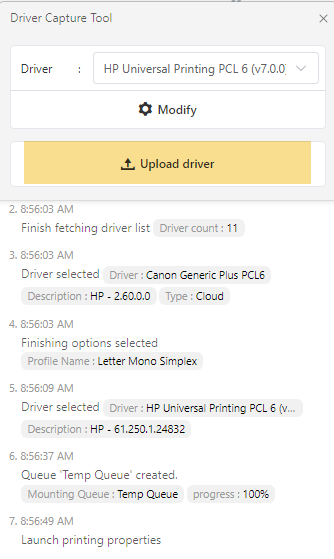
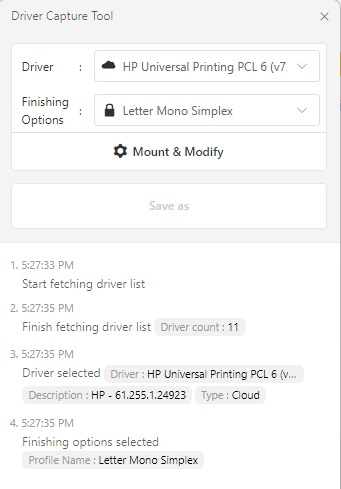
The Driver Capture Tool opens. Select Upload a driver.
-
In the Driver field, click the drop-down list box. Select the driver that you want to add from the alphabetically listed options.
Drivers are listed alphabetically by default, but you can use the Group View button (found at the end of the drop-down list box) to organize them into two categories:
-
Drivers can be uploaded to the cloud: Drivers installed on the workstation that can be uploaded to the cloud.
-
Drivers available in the cloud: Drivers already stored in the cloud, including pre-defined and previously uploaded drivers.
-
-
After selecting a driver from the list, select Mount and Modify. This opens the Temp Queue Printing Preferences dialog. Select the finishing options (for example, Letter, Duplex) that you want for this driver.
Note: The Mount and Modify function creates a temporary queue called "Temp Queue". You will use this queue to configure the finishing options you want to capture for the selected driver. The driver and finishing options combination are uploaded to the cloud.
-
Once you have selected the driver and set up the finishing options, select Upload Driver from the Driver Capture Tool.
-
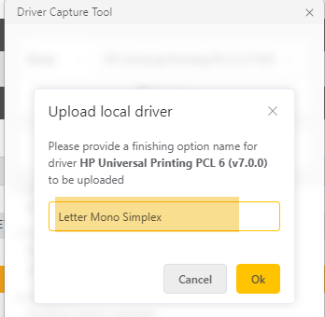
In the Upload local driver dialog that appears, enter a name for the finishing option configuration. The driver and its accompanying finishing option will be uploaded to the cloud and will be added to the list of available print driver and finishing options in the Pharos Cloud web console.
-
Verify that the driver and finishing options combination are uploaded to the Pharos Cloud by navigating to the Queue Properties > Configuration section of the Direct > Direct Printers > Print Queues tab.
Adding new finishing options for an existing driver
Using the Driver Capture tool, you can add new finishing options for existing drivers in Pharos Cloud. For example, IT admins can create a new finishing option configuration (e.g., A3, Color, Duplex) for the existing HP Universal Printing PCL 6 (v7.0.1) print driver.
-
On a machine where Print Scout is installed, log in to the Pharos Cloud web console.
-
Navigate to the Direct Printer > Direct Printers > Print Queues tab.
-
Select any queue from the list and then launch the Driver Capture Tool by selecting the Upload Driver link as shown below.

-
Click the Open button on the dialog box that appears.
-
The Driver Capture Tool opens. Select Modify driver profile.
-
In the Driver field, select the driver that you want to create new finishing option for.
-
In the Finishing Options field, select any option and then edit the configuration as desired by clicking Mount and Modify. This opens the Temp Queue Printing Preferences dialog.
-
Note: The Mount and Modify function creates a temporary queue called "Temp Queue". You will use this queue to configure the finishing options you want to capture for the selected driver.
-
Select the finishing options (for example, Letter, Duplex) that you want for the selected driver.
-
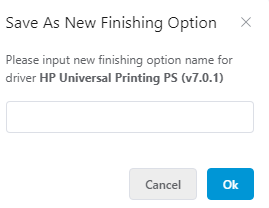
Click Save As. The following dialog appears. Enter the name for the new finishing option and then click Ok.
The finishing option should be added to Pharos Cloud. Check the Finishing Options under the Configuration section (Direct > Direct Printers > Print Queues tab) of the web console.
Modifying finishing options
1. On a machine where Print Scout is installed, log in to the Pharos Cloud web console.
2. Navigate to the Direct Printer > Direct Printers > Print Queues tab.
3. Launch the Driver Capture Tool by selecting any queue from the list and then selecting the Upload Driver link as shown below.
4. Click the Open button on the dialog box that appears.
The Driver Capture Tool opens.
5. In the Driver field, select the driver that you want to modify the finishing option for.
6. In the Finishing Options field, select the finishing option you want to modify.
7. Select Mount and Modify. This opens the Temp Queue Printing Preferences dialog. Edit the finishing options as desired.
8. Save the finishing option. There are three options to save the finishing option configuraiton.
- Rename and Save - Update the existing finishing option configuration with a new name and update any changes to the configuration.
- Save - Save updates to an existing finishing option configuration.
- Save As - Create a new configuration from an existing finishing option and save any changes.
Limitation of the Save and Save and Rename options
The 'Save' or 'Save and Rename' options in the Driver Capture tool have a limitation when updating a finishing option configuration. If a finishing option configuration has been used and then the queue is deleted and reinstalled after using either of the Save options, the old configuration will be reapplied. However, if the scout spooler service has been restarted or the daily settings update has run overnight since the change was made, then the newer configuration will be applied during the reinstallation of the queue, irrespective of when the queue was deleted. Auto-install queues will apply the normal overnight update.
Therefore, when testing a configuration setup, making changes to the configuration, and removing and reinstalling the queue to test the configuration, it is important to restart the Scout Spooler Service after removing the queue so that the new configuration can be downloaded and applied.
Type 4 Driver Known Issues and Limitations
-
Print Scout Compatibility
Print Scout version 7.37 or later is needed to successfully upload or install Type 4 drivers. Older versions of Print Scout won’t install any print queues that are configured with a Type 4 driver and won’t show an error message to indicate the failure.
-
Retention of presets, shortcuts, and favorites are not supported for Canon, Ricoh, Lexmark, and Konica Minolta Type 4 Drivers. These need to be manually recreated. However, with HP and Xerox print drivers, these presets, shortcuts, and favorites can be copied or transferred along with user preferences.
-
Xerox and Canon User Preferences UI
When a Canon or Xerox Type 4 driver is initially installed, it only includes the basic user interface. To install the custom user interface (such as the User Preferences UI), administrators must complete additional steps. For example, Xerox drivers require admin users to run a separate MSI installer to add the User Preferences UI after the driver is installed.
If a driver is uploaded or captured before completing these extra steps, only the basic UI will be captured, and you won’t have access to the custom options (e.g. User Preferences UI). To avoid this, ensure the custom UI is installed before capturing or uploading the driver. If you have already uploaded the driver before installing the custom UI, you'll need Pharos Support to help fix this issue.
-
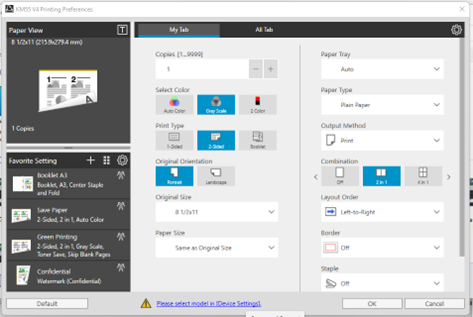
KM Preferences UI shows ‘Please select model in [Device Settings]’ link.
When you open the KM Preferences UI, it shows ‘Please select model in [Device Settings]’ link as shown in the image below. Clicking this link will close the Printing Preferences window—it will need to be reopened manually.