Configuring SCIM User Provisioning with Ping Identity
Pharos Cloud supports automatically provisioning users and groups from Ping sing the System for Cross-domain Identity Management (SCIM) protocol. This document outlines the steps to configure Ping to synchronize users and groups to Pharos Cloud using SCIM.
Note: SCIM support is available only upon request.
Note: SCIM with Ping Identity supports OpenID authentication type only.
Synchronization between Pharos Cloud and Ping Identity supports the following:
- Create users – Users created in Ping Identity are added to Pharos Cloud.
- Update user attributes – Updates to user attributes in Ping Identity are synced to Pharos Cloud.
Note: Ping Identity does not support user groups.
Note: Once a connection with SCIM is established, we do not recommend using the import function to import users into Pharos Cloud. You can however use import to add cards for the users.
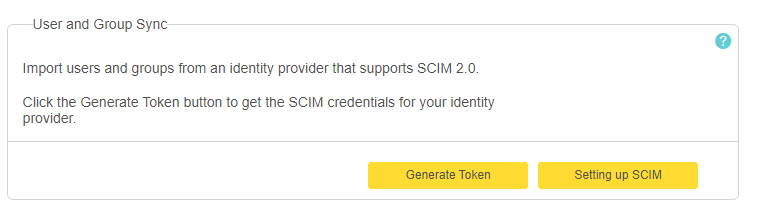
Step 1: Generate SCIM Credentials in Pharos Cloud Web Console
In this step, you will generate SCIM credentials in the Pharos Cloud web console for use in Ping.
1. In the Pharos Cloud web console, navigate to the Secure > Advanced tab.
2. In the User and Group Sync, click Generate Token.
3. The SCIM Credentials dialog appears.
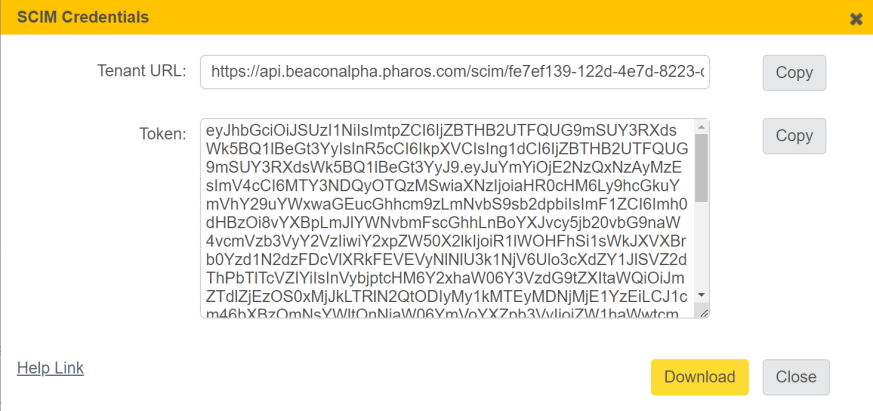
4. Download the Tenant URL and Token values. You will need these later when configuring the SCIM application in Ping.
Note: It is highly recommended to download a copy of the credentials using the Download button (instead of the Copy button). If you accidentally open a new tab, a new token will be generated and this may result in a mismatch.
Note: The Generate Token button changes to Regenerate Token if a token was already generated.
Note: The Token is valid for a year. If a token is about to expire or has expired, you will see an appropriate message in the Pharos Cloud web console. You will need to regenerate a token and update the token in Azure.
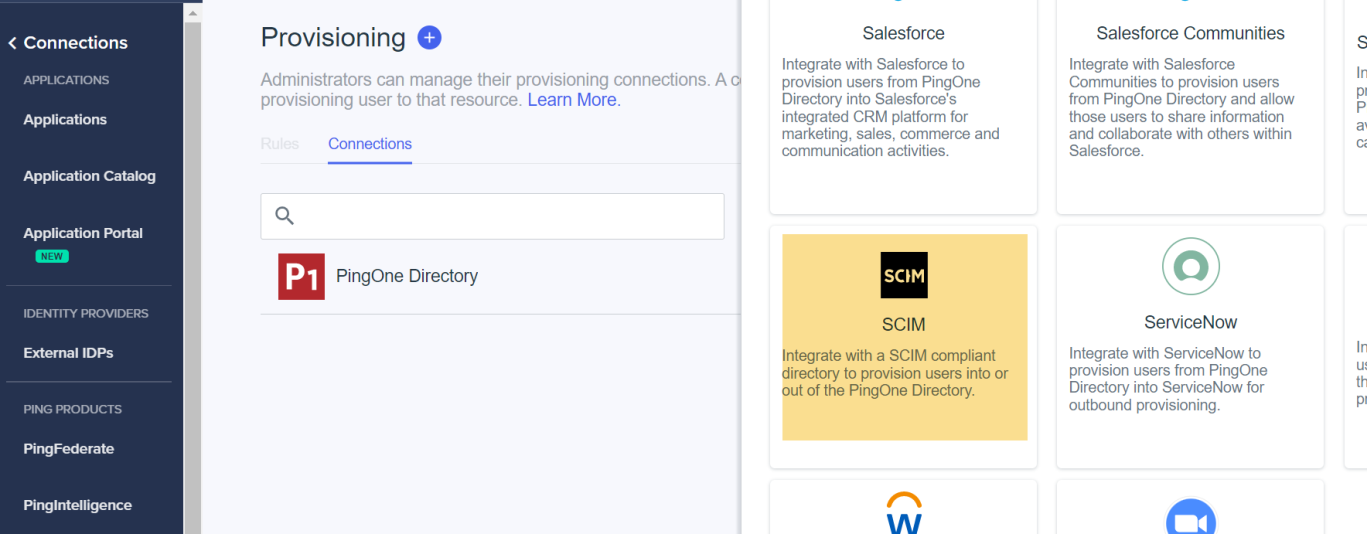
Step 2: Create a SCIM provisioning application in Ping Identity
1. On the PingOne portal, log in with an administrator account.
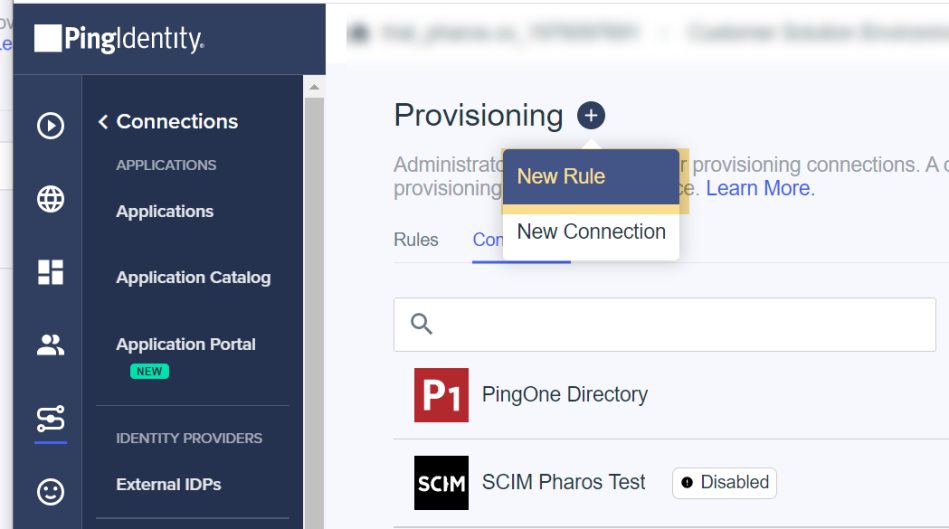
2. Under Connections, select Provisioning.
3. Click on + to add a new connection.
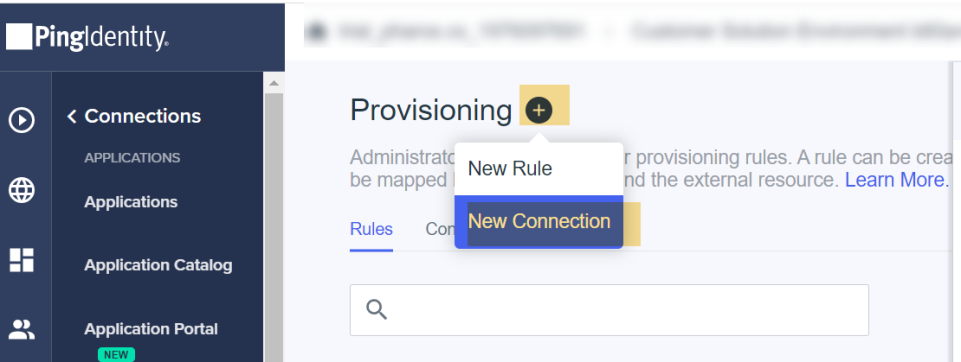
4. Select SCIM and then click Next.
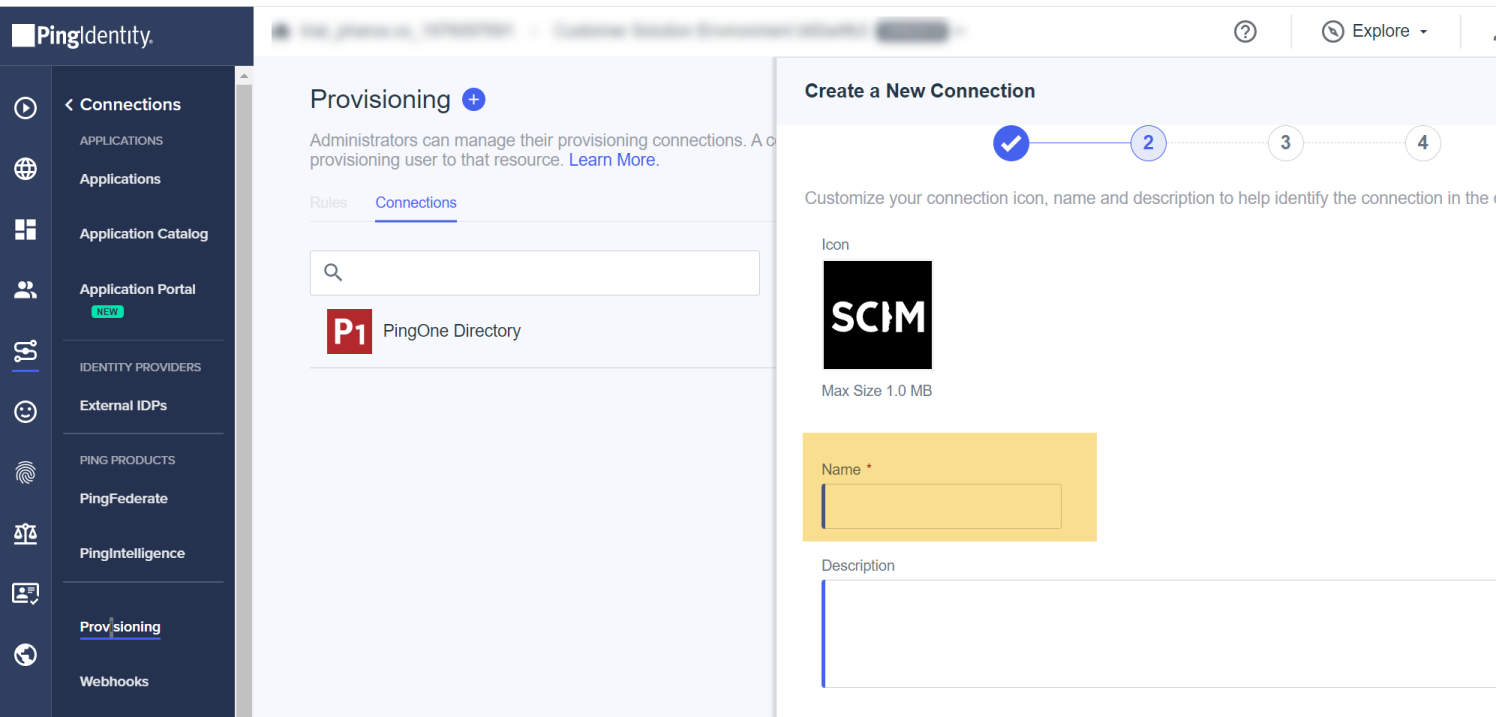
5. Enter the Name for the connection and click Next.
6. In the Configuration Authentication section:
- In the SCIM Base Url field, enter the Tenant URL obtained from the Pharos Cloud web console.
- In the Authentication Method dropdown list, select OAuth2 Bearer Token and then enter the Token generated from the Pharos Cloud web console.
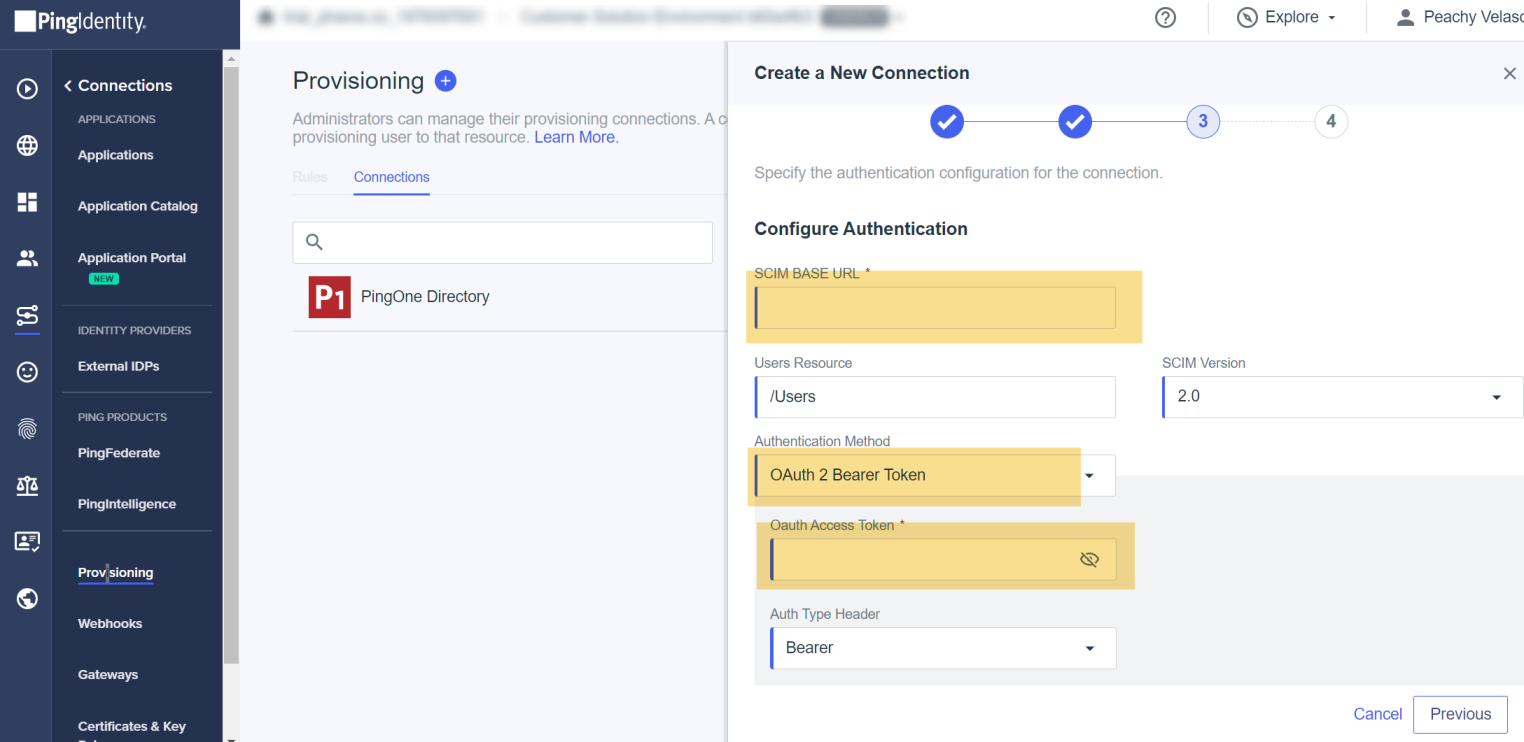
Note: Use the Tenant URL and Token values obtained in Step 1 of this document. You can get them from the Secure > Advanced > User and Group Sync tab or Direct > Settings tab in the Pharos Cloud web console.
7. Click Test Connection and then click Continue.
8. In the Configure Preferences section, set the following parameters:
- Set User Filter Expressionto externalId Eq “%s”.
- Set User Identifier to userName.
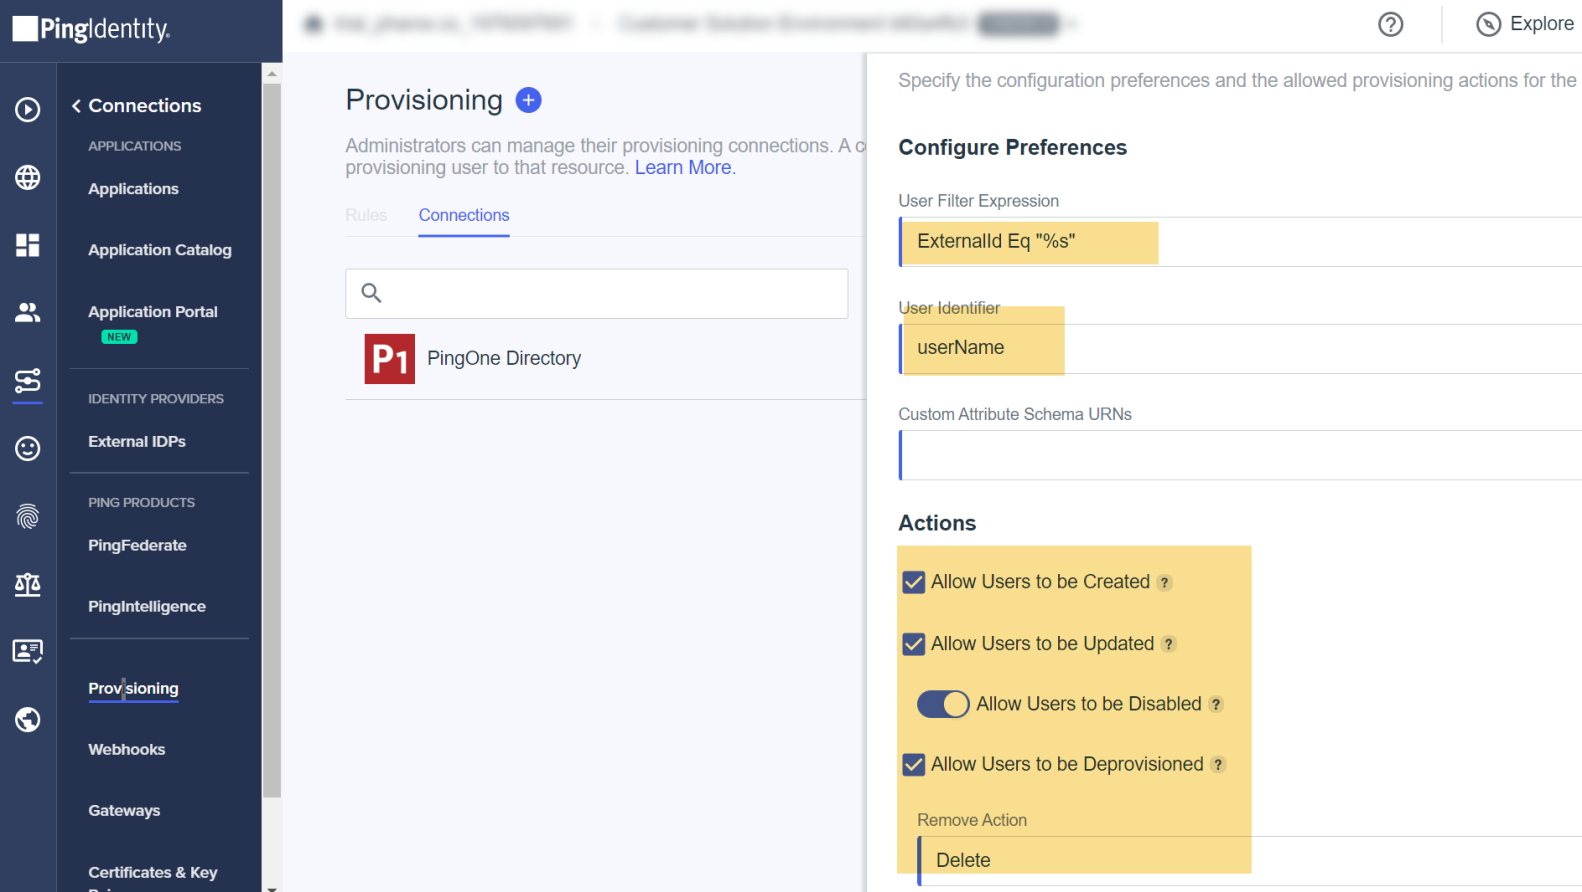
9. Click Finish. A new connection is created. Take note that the connection is disabled until Custom Filter and Attribute Mappings are set.
10. In the Provisioning tab, click on the New Rule button.
11. Enter the name for the rule and click on the Create Rule button.
12. Under Available Connections, select the connection you've created by clicking on the + icon. Click Save.
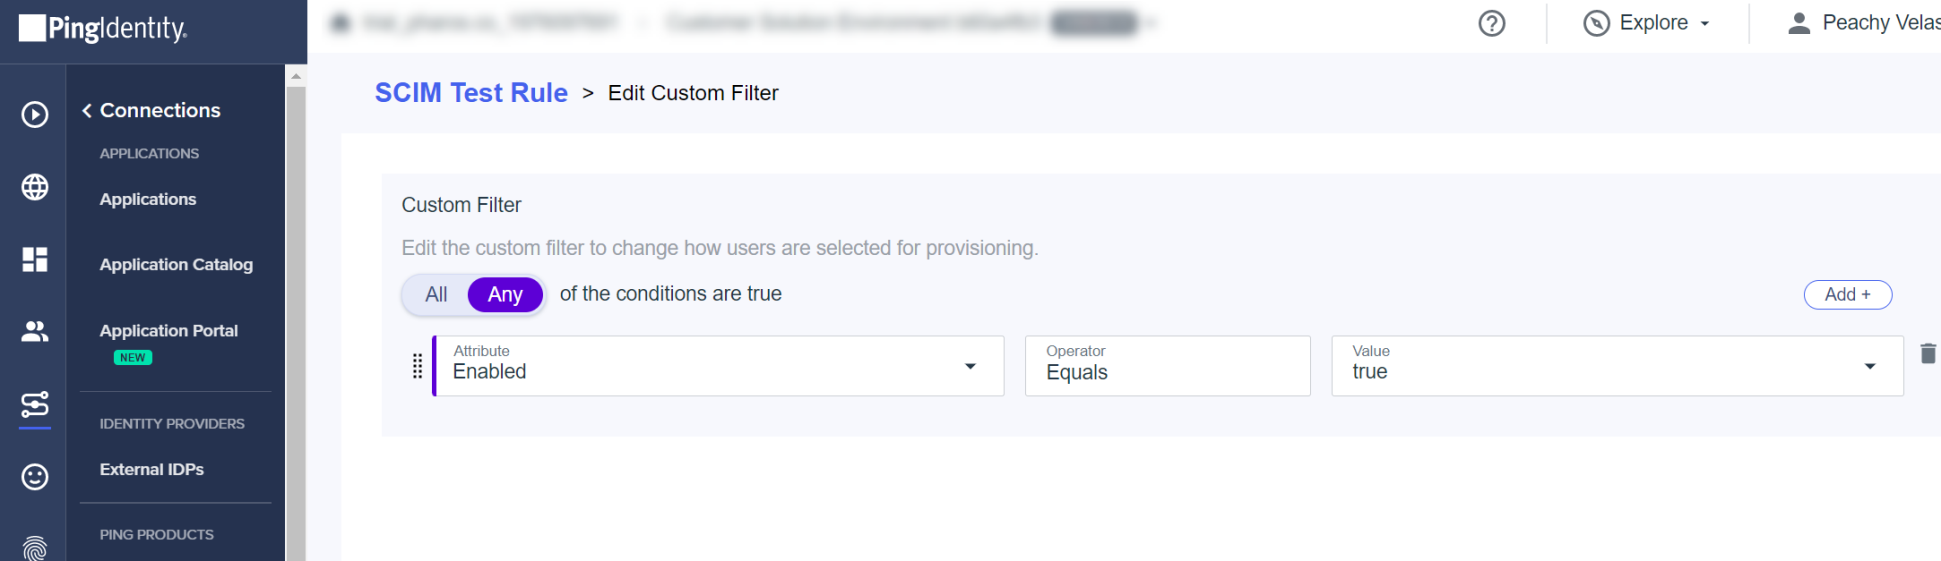
13. In the Custom Filter section, set the attribute to Enabled Equals true as shown below.
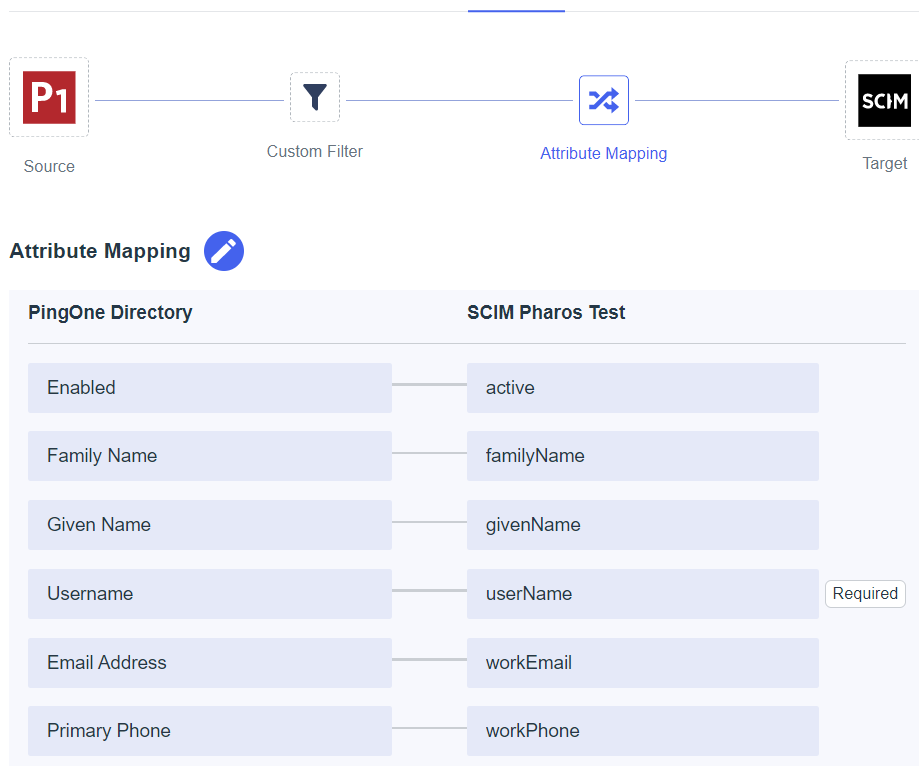
14. Set the attribute mappings as shown below.
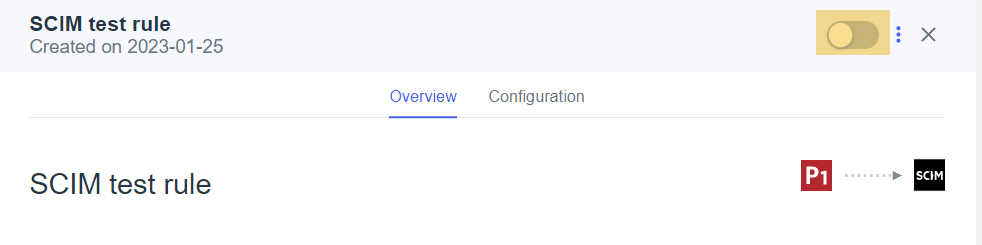
15. Enable the rule by toggling the slider switch.
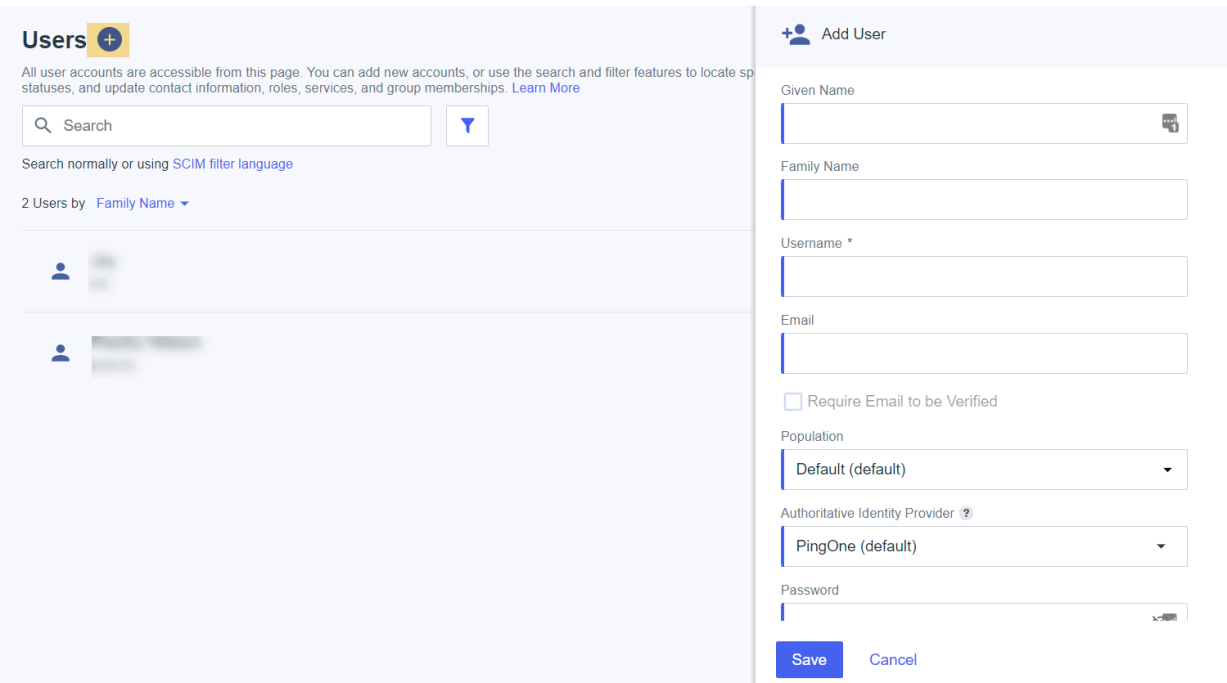
16. Navigate to the Identities section and then select Users. Click the + button to add user for provisioning.