Deploying the Universal Print Document Proxy to Azure
Note: Specifying a Document Proxy URL is suitable for sites with Hewlett Packard (HP) printers using Cloud Release only. For other printer manufacturers or for sites with HP printers who do not prefer to use Cloud Release, install a Universal Print compatible Print Scout instead.
The Universal Print Document Proxy is a simple web API service that facilitates fetching of print jobs from the Universal Print by HP printers on request. It is a proxy application that connects HP printers to Universal Print. The Document Proxy uses a temporary URI to fetch document data associated with print jobs and use that data to fetch the actual job data and return it to the printer. Pharos Cloud does not have access to the contents of documents printed through Universal Print.
The Document Proxy is an open source (https://github.com/pharos-nz-dev/msup-proxy) containerized service released as a Docker image (https://hub.docker.com/r/pharosdev/msup-proxy) built on [OpenResty](https://openresty.org/en/), an Nginx high performance application server. The container is Linux-based and is readily deployable through Azure.
The document details how to deploy the Universal Print Document Proxy on Microsoft Azure.
Prerequisites
- Active Microsoft accounts
- Active Microsoft Azure subscription
Deployment Steps
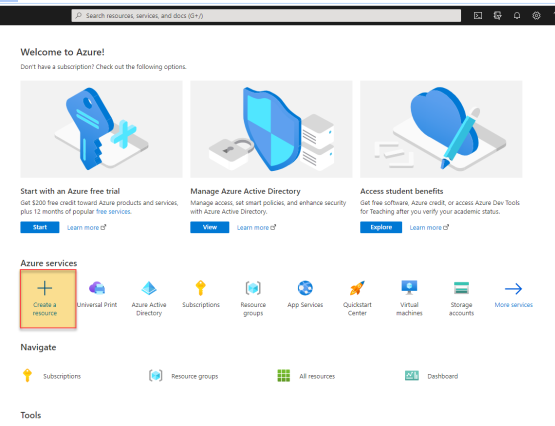
1. Sign into the Azure Portal (https://portal.azure.com/#home).
2. Select Create a resource.
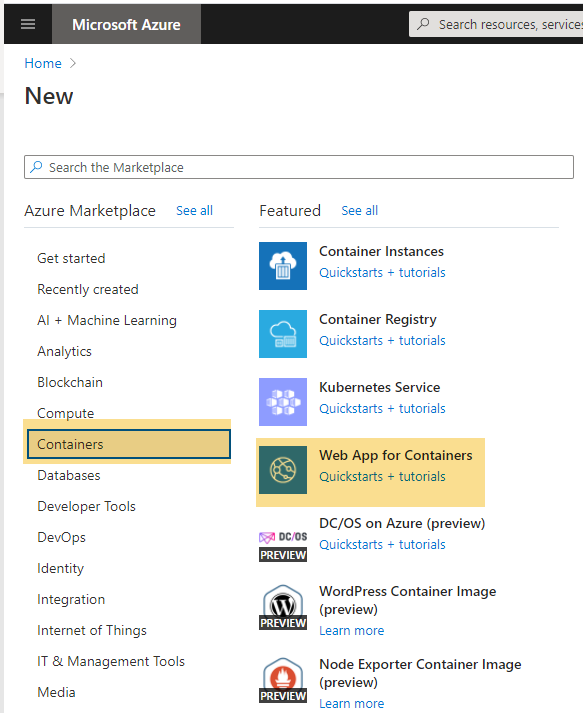
3. Select Containers > Web App for Containers
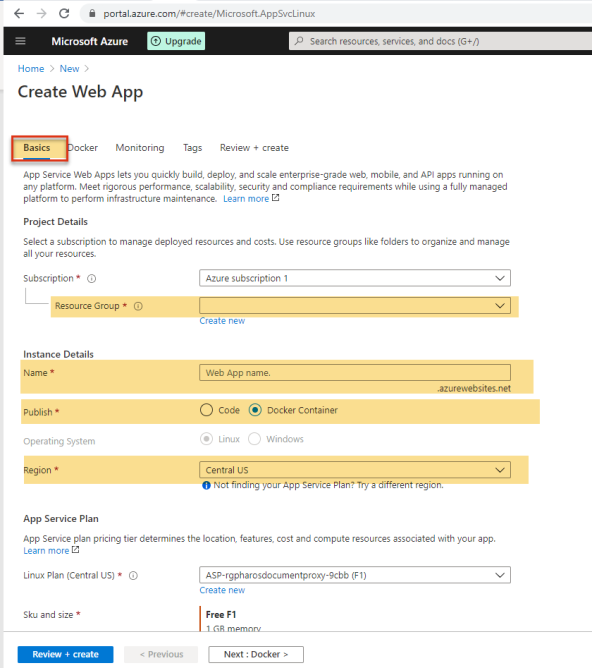
4. In the Basics tab, fill in the required fields:
- Subscription – Select your subscription type.
- Resource Group– Use an existing resource group or create a new one.
- Name – Enter a unique name for the instance. This will be the name of the website which will appear in the URL.
- Publish – Select Docker Container.
- Region – Choose your region.
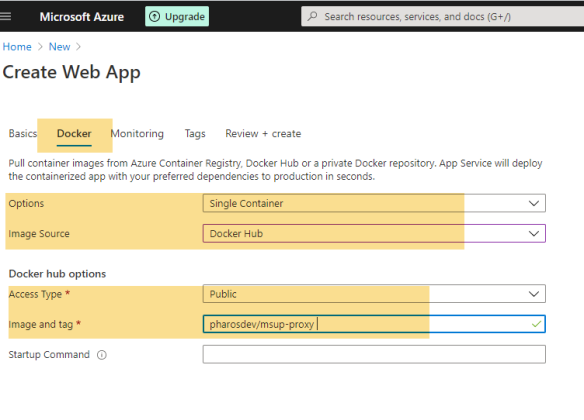
5. Click Next: Docker > to move to the Docker tab and configure the settings as follows:
- Options: Single Container
- Image Source: Docker Hub
- Access Type: Public
- Image and Tag: pharosdev/msup-proxy. This is the name of the Universal Print Document Proxy image in the Docker Hub.
Note: You can add optional parameters like tags if desired.
6. Select Review + create then click Create to complete deployment. You will see the message “Your deployment is complete”. This process may take a few minutes.
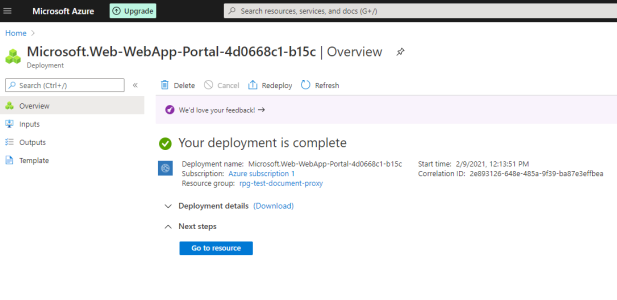
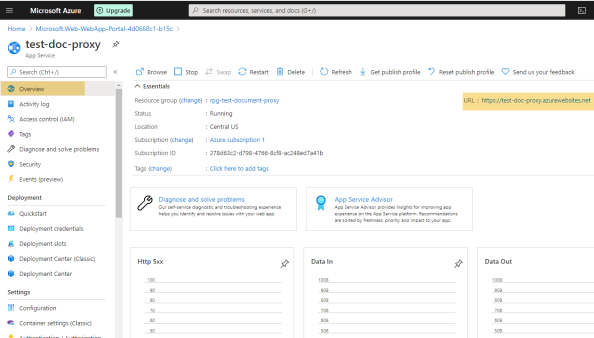
7. Select the Go to resource link to see the overview of the resource created. Take note of the base URL.
8. Log in to the web portal and navigate to the Secure > Universal Print tab.
9. Enable the Universal Print integration.
10. In the Document proxy url field, enter the URL you obtained in Step 7.
For information on how to enable the Universal Print Integration, refer to the Configuring Universal Print Integration document.
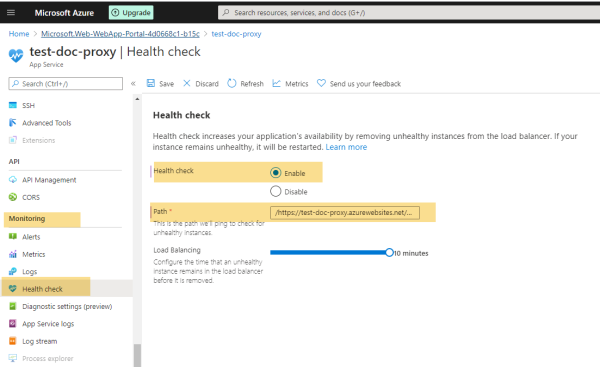
Configuring Health Check
To check if the instance is running, you can configure a health check under the Monitoring section. Use the path URL/health-check that is built into the container to configure health check.
Related Topics: