Configuring Microsoft Azure for Secure Scan
Note: This document applies to sites with tenant-based configuration only. In tenant-based configuration, administrators are required to create an application in the Azure portal and gave the Secure Scan app access to a certain set of permissions for the organization’s Office 365 document space. If you are interested in user-based authentication, refer to the User-Based Authentication section in the Configuring Secure Scan document.
Secure Scan uses the Microsoft Graph API to upload document to OneDrive or SharePoint. To integrate with the Graph API, you will need to register an app (that represents Secure Scan) to Azure AD and declare the required permissions. This document shows you how to prepare your site for Office 365 integration.
Note: It is assumed that your organization has an Azure account with an active Azure AD Tenant.
Step 1: Create an application definition in the Microsoft Azure portal
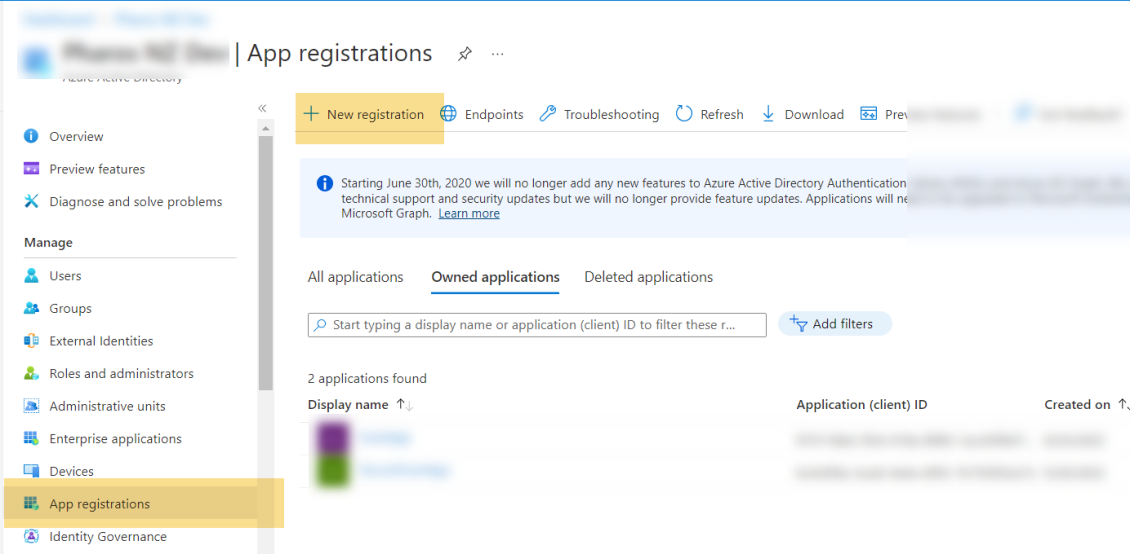
1. Visit your Microsoft Azure Active Directory administration portal.
2. In the App registrations pane, click the New registrationbutton.
3. Fill in the Register an application page.
- Enter a Name that uniquely identifies your application. For example, Secure Scan.
- Choose Single directory tenant.
4. Ignore the Redirect URI section.
5. Click the Register button.
6. Once the application is created, you will see the Overview pane. Open a new text editor(e.g. Notepad) window, and copy the Application (client) ID and the Directory (Tenant) ID into it. You will need them later to configure Secure Scan settings in the Pharos Cloud web console.
Step 2: Create a Client Secret
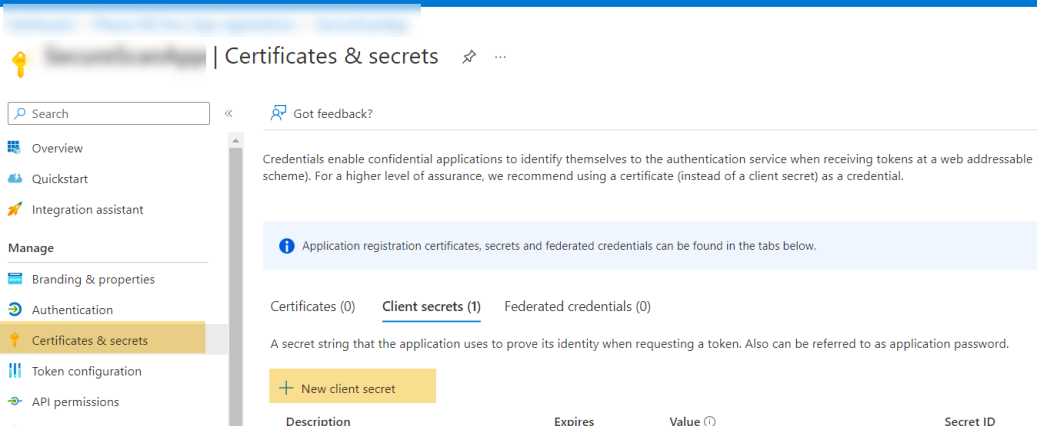
1. Return to the Azure portal and your application properties.
2. Select Certificates & secrets. In the lower portion of the page, click New client secret and choose an appropriate expiry date.
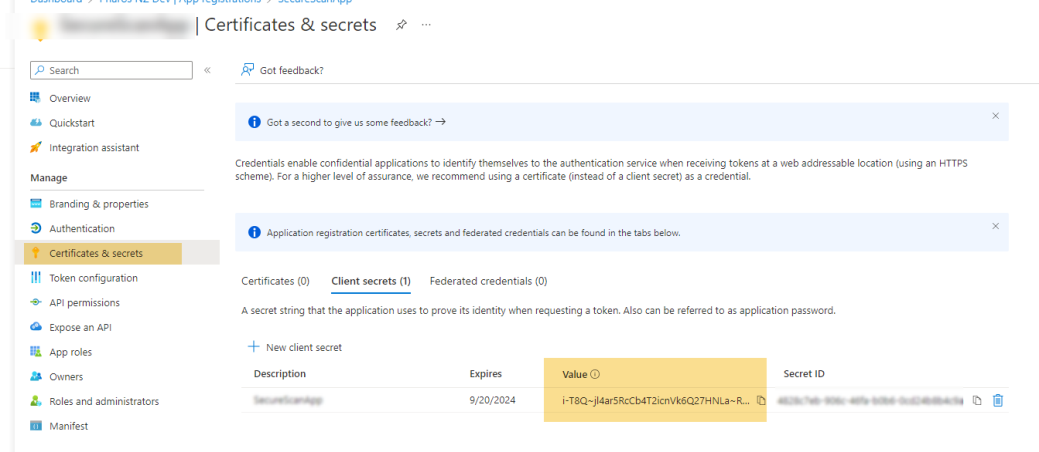
3. Copy the Value of the client secret to your Notepad window. The value will be used later in this procedure.
Step 3: Configure Permissions for Microsoft Graph on your application
1. Once the new application has been created, click API permissions.
2. Click Add a permission.

3. Select Microsoft Graph, and then Application permissions.
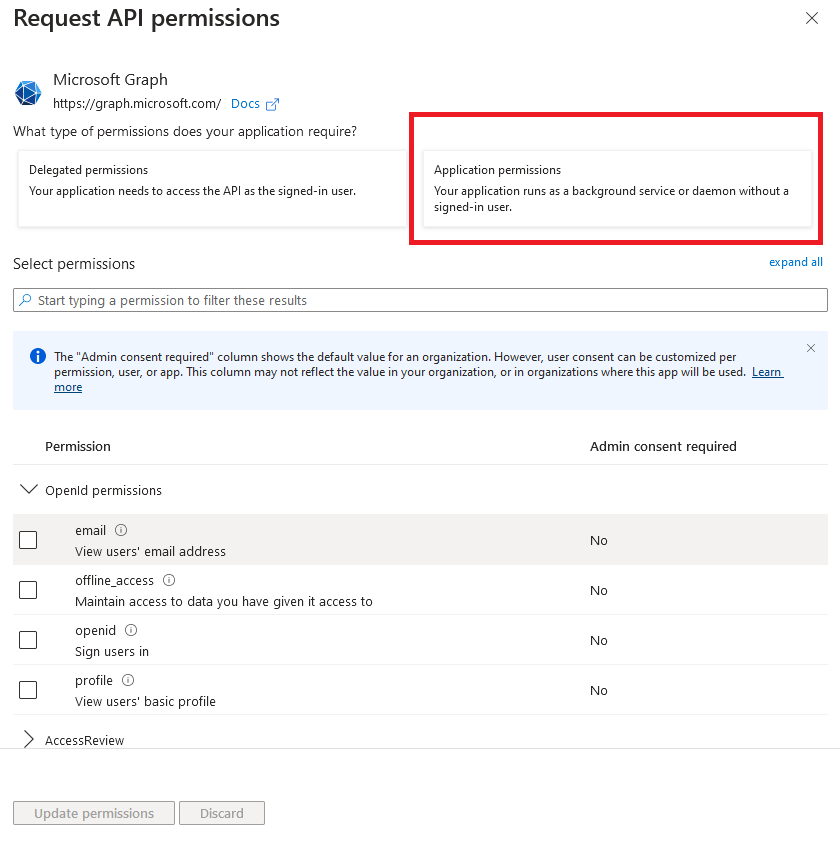
4. Add the following permissions:
- Directory.Read.All
- Files.Read.All
- Files.ReadWrite.All
- Sites.ReadWrite.All
- User.ReadWrite.All
- User.Read
- User.Read.All

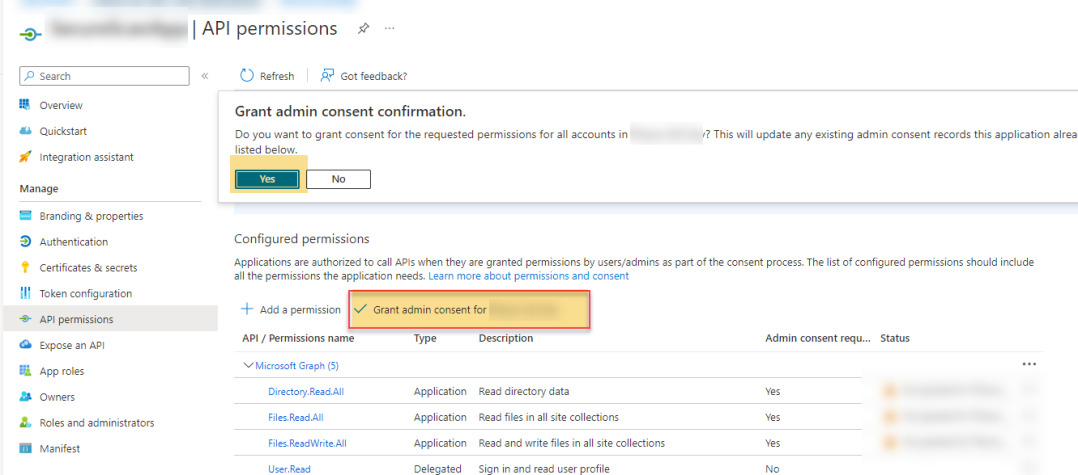
Step 4: Grant Admin Consent
After permissions are added, you will need to grant admin consent for all the permissions added to the application.
Step 5: Configure Secure Scan in the Pharos Cloud Web Console
Once you have registered the Secure Scan application in the Azure portal, you can now add Azure settings into thePharos Cloud web console.
Before you begin
Make sure you have the following information from the application you registered on your MS Azure AD portal.
- Tenant ID
- Client ID (Application ID)
- Client Secret
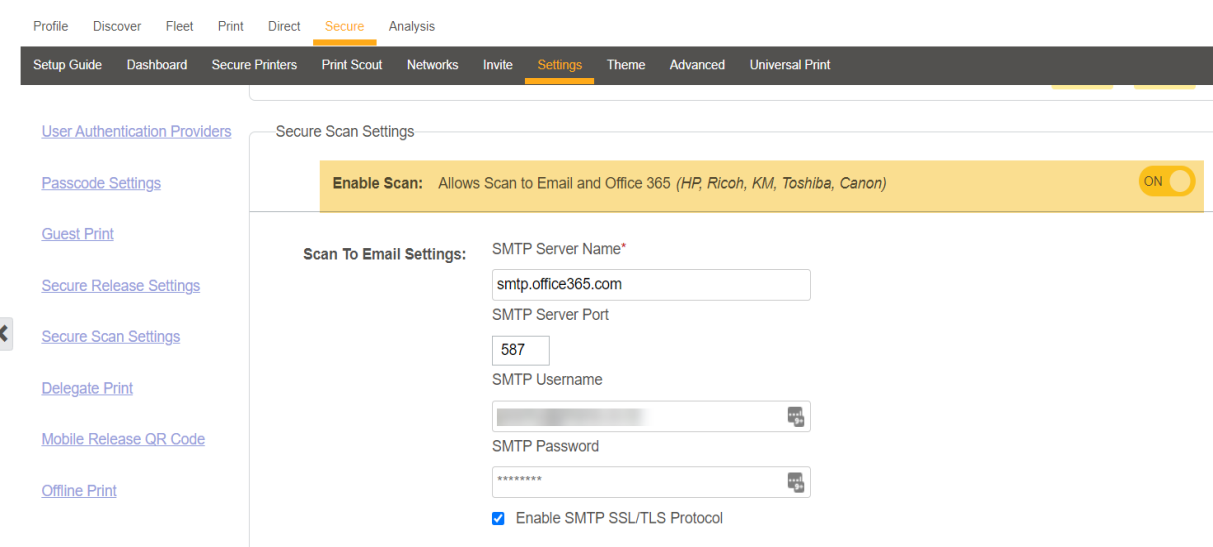
Enable Secure Scan
1. Navigate to the Secure > Settings screen on the Pharos Cloud web console.
2. In the Secure Scan Settings section, enable Secure Scan by turning the toggle switch on.
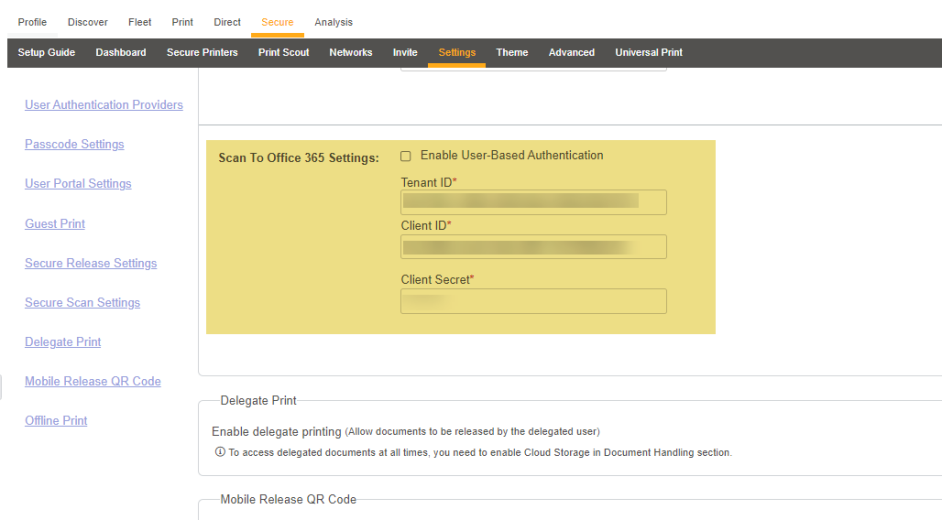
Configure Scan To Office 365 Settings
In this section, you'll add the Azure settings into Pharos Cloud.Refer to the Scan to Office 365 Settings (OneDrive ) in the Configuring Secure Scan document.
Related Topics: