Configuring Secure Release with OpenID Connect
You must first register an application for Secure Release on your OpenID identity provider (e.g. Google, Azure Active Directory). The process of registering an application may vary. Secure Release needs the following details from the identity provider:
- Client ID
- Client Secret
- Well-Known Endpoint
You’ll also need to make sure that redirect URI is added to the OpenID Identity provider’s “Authorized redirect URIs” list.
Register Secure Release as an application in Microsoft Azure AD
This section details the steps required to create an application registration within Microsoft Azure for use with Pharos Secure Release. It is assumed that you already have an Azure account with an active Azure AD tenant.
Within the Azure AD tenant, you’ll need a registration for the application. The registration is a record of security details for the application in Azure AD. A registration ensures that Azure AD can identify the application and the user.
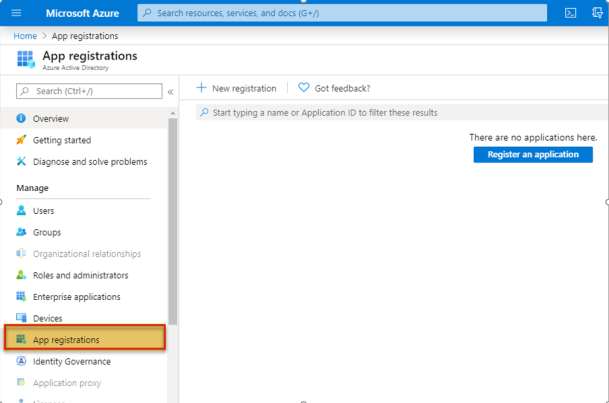
1. On the Azure Active Directory page, under Manage, select App Registrations.
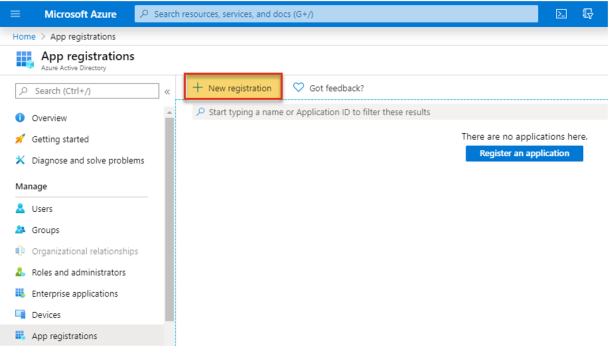
2. In the App Registrations pane, click the New Registration button.
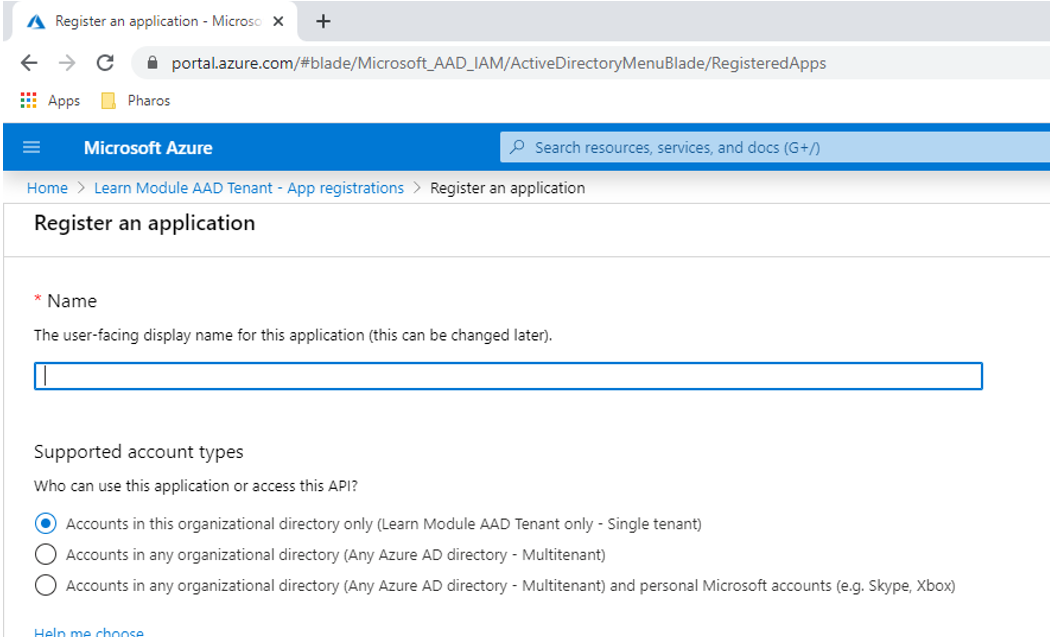
3. Fill in the Register an application page.
- Enter a Name that uniquely identifies the application. For example:Pharos Secure Release
- Select the option that best defines the users who will be allowed access. Typically, this will be the single directory tenant.
- Click the Register button to complete registration.
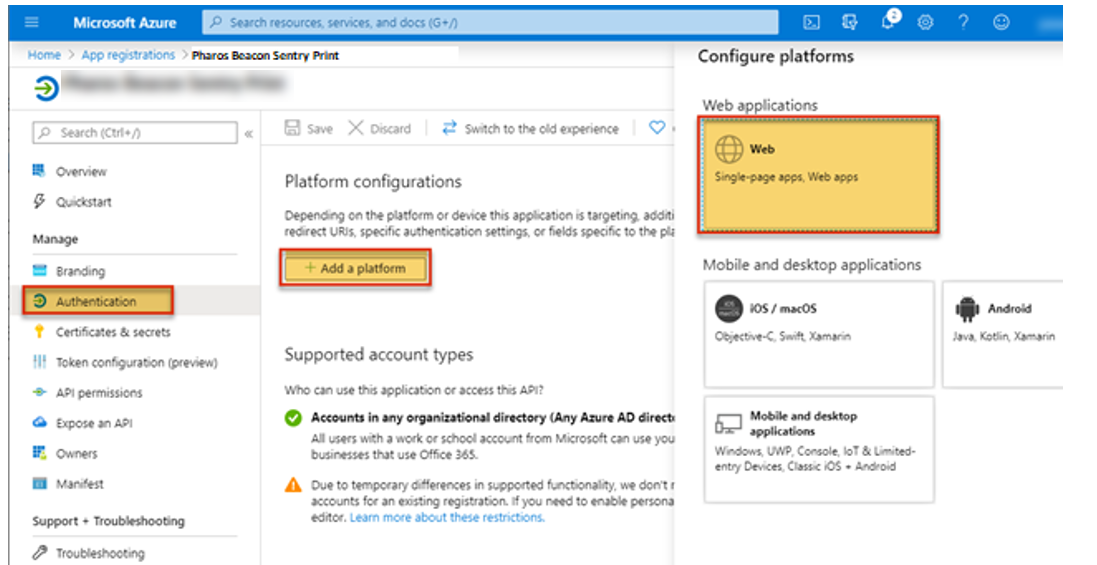
4. Under Manage, select authentication and then click the Add a platform button. Select Web from the platforms listed on the right.
5. Fill in the Configure Web page.
- Enter the appropriate Redirect URI, as provided below.
- Enable the ID token grant.
When completed, click the Configure button at the bottom of the page.
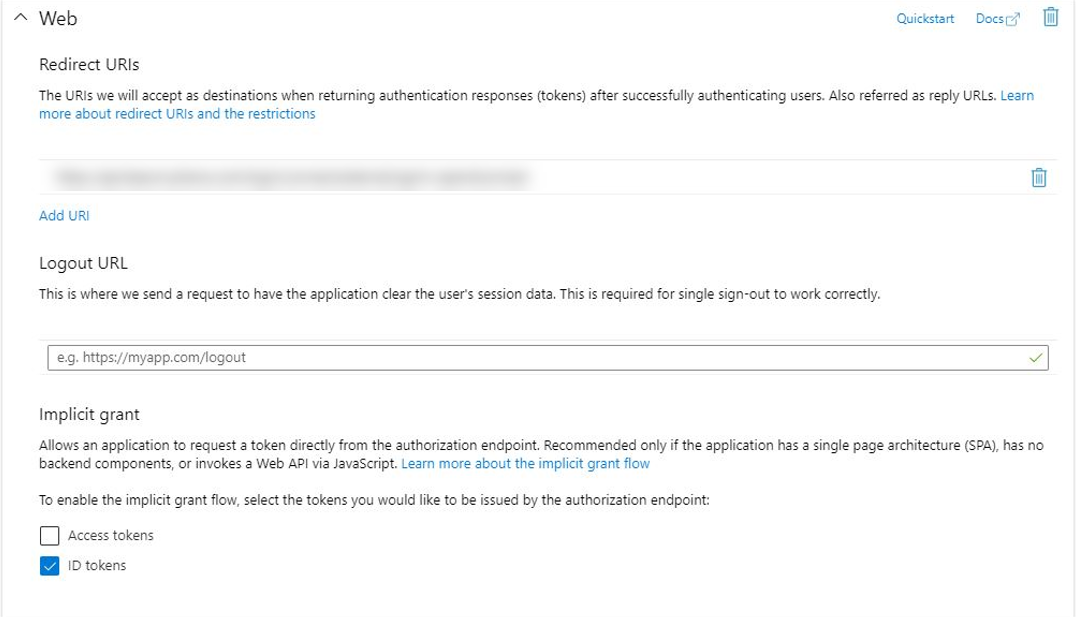
Redirect URI for Secure Release
https://api.beacon.pharos.com/login/connect/external/signin-openidconnect
Note: If you've initially entered an incorrect Redirect URI and subsequently corrected it, the system may not function properly. To resolve this, you will need to exit the Secure Print app (from the app tray) and then reopen it.
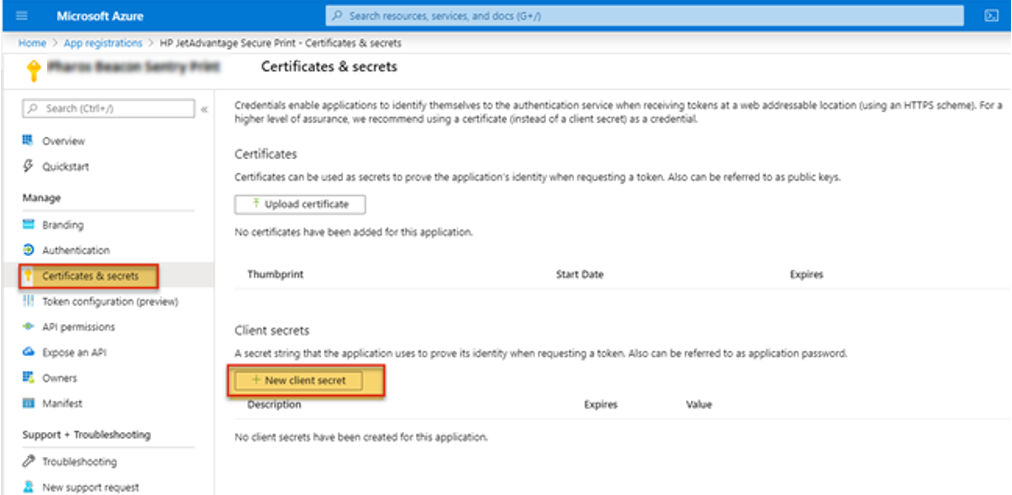
6. Under Manage, select Certificates & Secrets. Click the New client secret button.
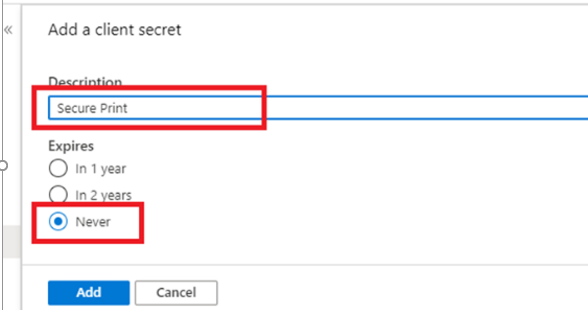
7. Fill in the Add a client secret page.
- Enter a Description that identifies the client secret. For example, Secure Release.
- Select the option to Never expire the secret.
- Click the Add button when completed.
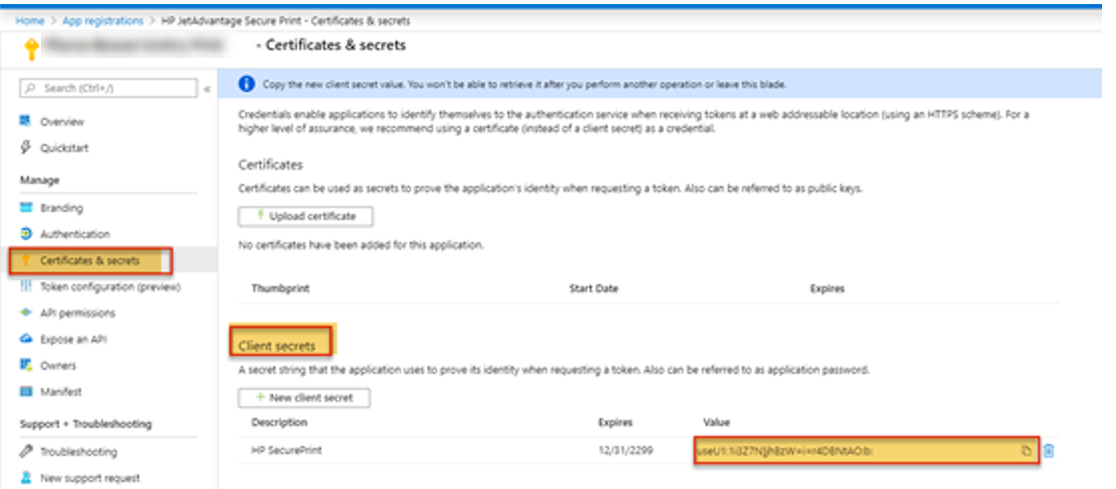
8. Copy the Value of the client secret. The value will be used later in this procedure.
9. Select the Overview link from the left side menu and then copy the Application Client ID. This value will be used later in this procedure.
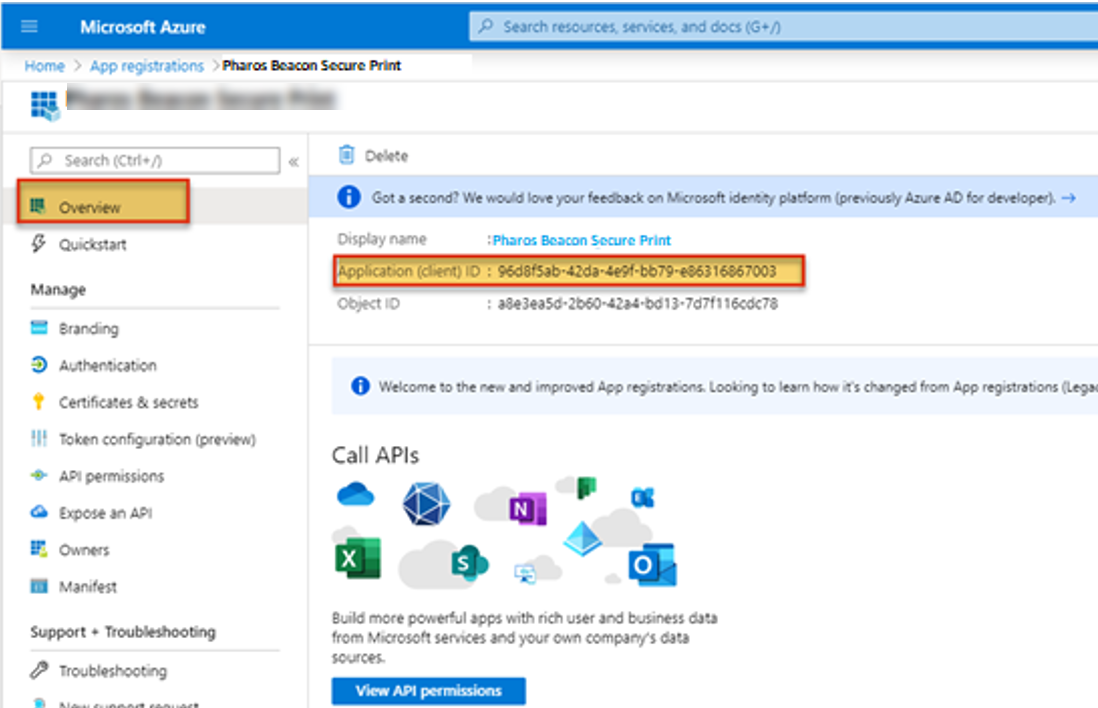
10. Click on the Endpoints button at the top of the Overview page.
11. Copy the value of the OpenID Connect metadata document URL. The value will be used later in this procedure.
Configure Secure Release with OpenID Connect
After you’ve registered the Secure Release application to your OpenID provider, you can now add the client-specific OpenID Connect settings into Secure Release.
Three items will be required:
- Well-Known Endpoint – This is the OpenID Connect metadata document URL that you copied in step 12 above.
- Client ID – This is the Application (client) ID that you copied in step 10 above.
- Client Secret – This is the Client Secret that you copied in step 9 above.
1. Log in to the web console.
2. Navigate to the Secure > Settings tab.
3. In the User Authentication Providers section, select OpenID Connect.
4. Enter the following details:
- Well-Known Endpoint
- Client ID
- Client Secret
Related Topic: Secure Release and OpenID Connect (OIDC)