Location-based Printing
Overview
Note: Location-based Printing is supported on both the Windows Print Scout and the Mac Print Scout.
Printers can be in multiple areas within a building or multiple offices and branches around the world. Location-based printing enables users to print to devices based on the network location of their workstation. The Print Scout, installed on user workstations, identifies the user's current location and presents a list of available printers at that location.
Direct Print uses the concept of “locations” to represent the physical structure of your organization and to define printers’ locations in relation to your organization’s physical layout.
Here’s how locations are configured for Direct Print:
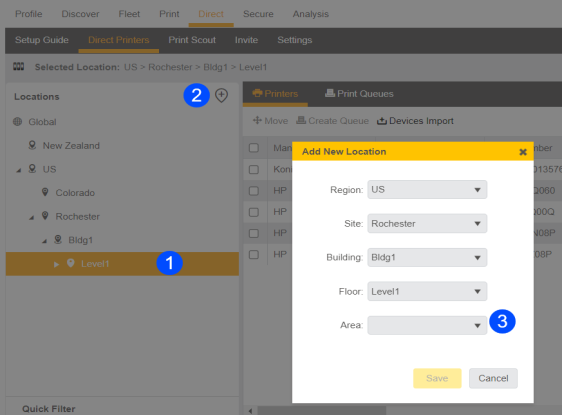
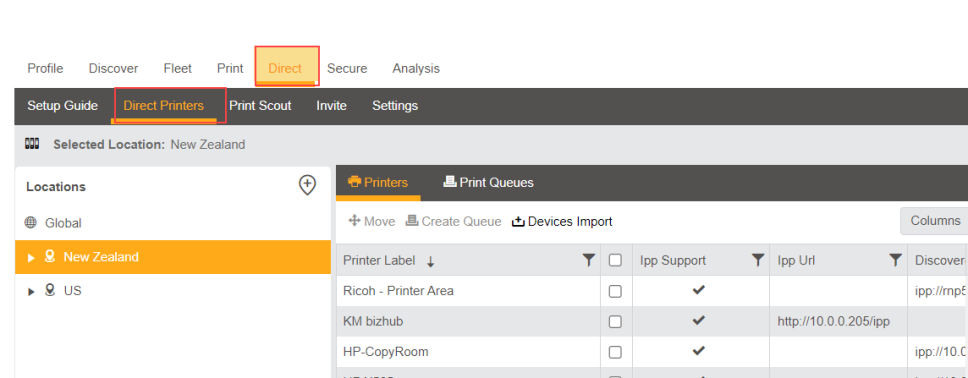
- Locations are added and managed in the Direct > Direct Printers tab of the Pharos Cloud web console.
- Locations are configured in tiers to create a hierarchy of your organization’s physical location. At the top of the hierarchy is the Region, which holds child locations Site, Building, Floor, and Area.
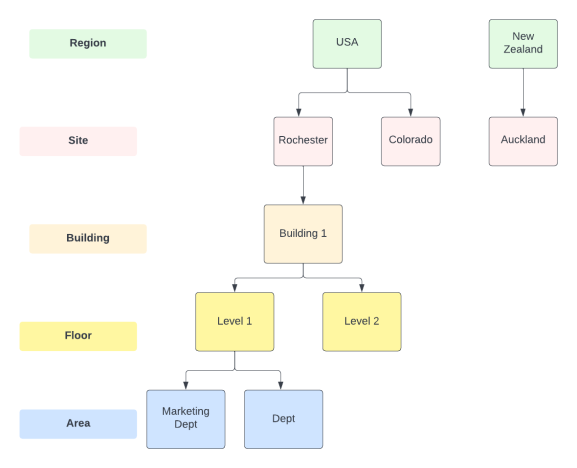
Note that the depth of a location tree may vary depending on the structure of the organization and the available network information. In the following example, the USA region includes more levels compared to a smaller organization located in a single city in New Zealand (within the same subnet, for example).
- Locations can be configured with network information if auto-installing printers on user workstations. If network information is not available, is unsuitable, or is not preferred:
- Users can manually select a location or manually install printers themselves.
- IT admins can assign an initial location before deploying Print Scouts to user workstations.
- Print devices are assigned to locations. Each print device can have one or more associated print queues. A print queue can be one of two types: Windows queue or IPP queue.
Users have various options for using location-based printing depending on the configuration of network information on the Workstation Location. Before setting up location-based printing in your Direct Print environment, it is advisable to review this document.
- Automatic installation of print queues
- Manual selection of location
- Manual installation of print queues
- Setting up Initial location
Automatic installation of print queues (Auto-install printers with network information)
Direct Print includes the ability to automatically install print queues on users’ workstations based on their location. This allows users to immediately print as soon as they connect their workstation to their location’s network. No user intervention is required. Users do not have to search for and add a print queue.
As the user moves from one location to another, the Pharos Print desktop app automatically switches to displaying printers at the user’s current location. For example, when users are at their head office, they will see the head office printers. When they move to one of their branch offices, they will automatically see printers in that location. Printers from the head office are automatically uninstalled.
To automatically install direct printers on user workstations, IT admins will need to do the following:
- Print Queues must be configured as “Auto-install” on the Pharos Cloud web console.
- A user’s workstation location must match any of the following information.
- Wi-Fi SSID
- Gateway
- IP Range
Manual selection of location (Auto-install printers without network information)
If network settings are not configured for a location and the organization has set up auto-install printers, users can manually select their location, upon which auto-install printers are automatically installed.
Notes:
- The workstation location is locked to the manually set location. This means that any user who is logged on to the workstation will get the printers from that location.
- This is a permanent setting. If a location has been manually set, any changes to the network do not affect the location. This means that if the user moves to a different location, the location remains unchanged.
Manual installation of print queues (Manual-install printer without network information)
If locations are configured without network information, users can manually add printers using the Pharos Print desktop app.
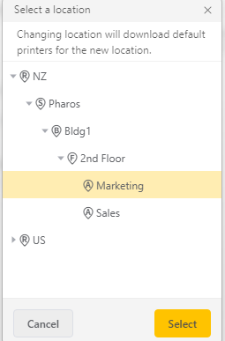
Users can use the location tree to search for and add a printer. Users are presented with a list of available printers based on the location they selected.
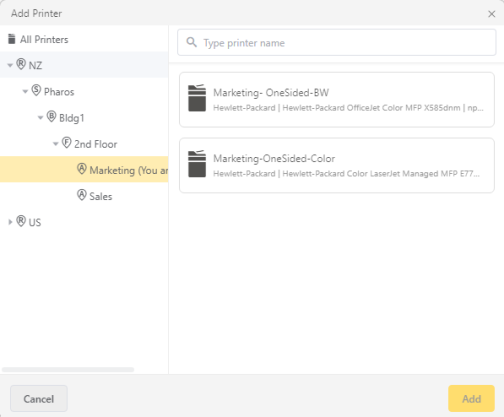
Users can also search for printers by typing any of the following printer information Printer Label, IP address, or hostname.
Note: Manual install printers are print queues with the Type set to “Manual-install”.
Initial Location
You can assign an initial location before deploying it to user workstations. This is particularly useful in situations where network information for a workstation location is not configured. Configuring an initial location provides users with immediate access to their printer list, even when workstation locations are not configured. This enhances the initial user experience and simplifies the Print Scout deployment process.
Notes:
- The primary function of the initial location is to provide a location for a workstation that would otherwise lack one. It is referred to as "initial" because it solely serves this function during the initial installation. Once the system identifies a matching workstation location or a user manually designates a location, the initial location is no longer required. The matched or selected location supersedes the initial location value.
- Initial location applies to new installations of Print Scout only and does not apply to upgrade scenarios.
Auto-install queue (Workstation Location not configured/no matching location)
If network information is not configured or the network information does not match and initial location is set up, users will immediately see the list of available auto-install queues in their location without having to manually add a location or a printer.
Manual queue (No workstation location/no matching location)
In the case of manual queues, when a user attempts to manually add a direct printer, they will now instantly directed to the Initial Location configured, where they can view the available printers within that specific location. Users do not have to go through a list of all printers and choose from various locations. This streamlined approach is particularly advantageous for organizations with many locations and many configured printers.
How to set the Initial Location
- Open the Print Scout Configuration tool (Configuration.exe) from the install directory (typically
Note: The Mac Scout Configuration tool does not yet support the feature to create an initial location so administrators will need to use the Windows Print Scout Configuration to define the initial location and create the deployment package.
- Click the Configuration option.
- Select the Default Settings tab.
- In the Workstation Location section, select the Initial Location. To choose an initial location, click the "Select" button .
Note: The Initial Location is set to None by default. When set to "None," Direct Print works as in previous version where users will be required to manually choose a location or manually install a printer using the Pharos Print desktop app if no auto-install printers are available or if there is no matching location.

- Create a deployment package by clicking the File menu and then selecting Create Deployment Settings file.
-
Locate the deployment files from
Note: For mac OS Print Scout, you will need to replace the Windows Print Scout Installer with the Mac Print Scout installer before deploying to Mac workstations.
- Deploy these files to user workstations.

Managing Locations
Creating a location
For information on how to create a location, refer to the Configuring Direct Print document.
Deleting a location
To delete a location:
1. Navigate to the Direct > Direct Printers tab.
2. From the Locations tree, select the location you want to delete.
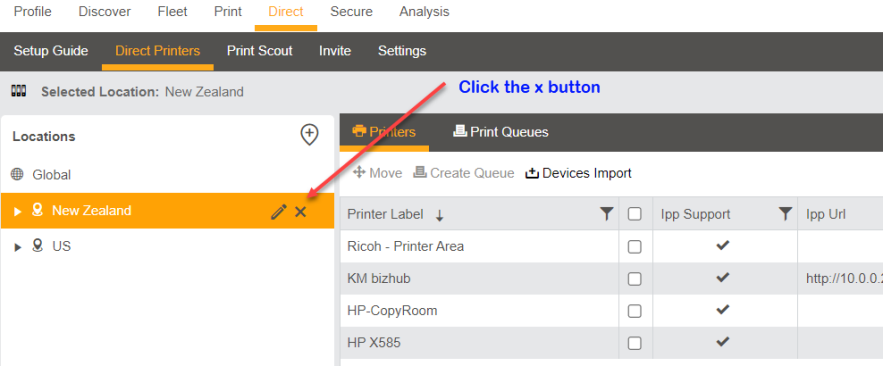
3. Click the x button next to the location.
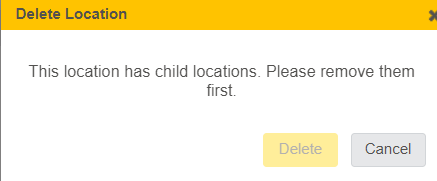
If your location has child locations, you will see this dialog box.
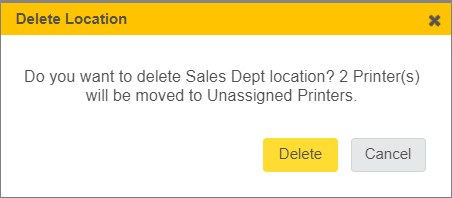
If a location has printers assigned to them, you will see a confirmation box. Click Delete to delete the location.
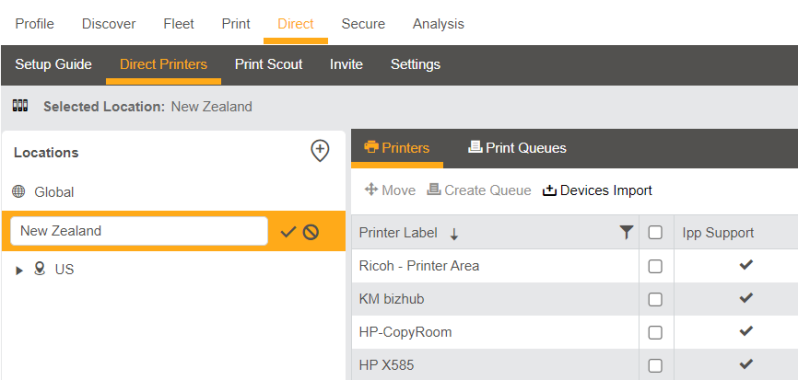
Editing the name of a location
1. In the Direct > Direct Printers tab, select the location by hovering over the location name.
2. Click the edit icon (pencil icon).
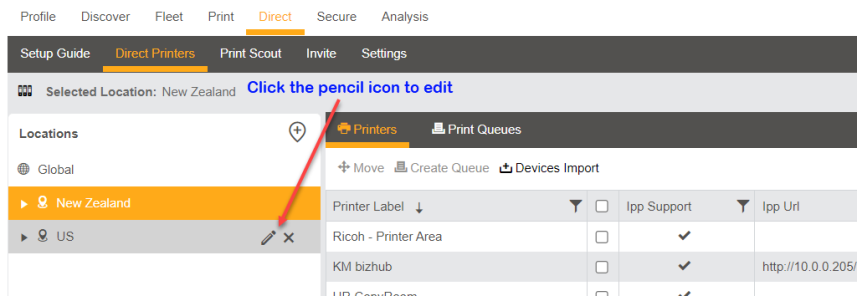
3. Enter the new name for the location and then click on the  button to save the changes.
Adding child locations
Add one or more child locations if required. To do this, you can select the location you want to make child locations under and then click the  button.
The following example adds Sales Dept under Level 1. Select Level 1 from the location tree, click the button (next to Locations), and then in the dialog box that appears, add the Sales Dept and click Save.