Configuring Direct Print
This document details how to configure locations, assign printers to locations, and print queues for use with Direct Print.
Step 1: Create Locations
You can create locations in the Direct > Direct Printers tab on the Pharos Cloud web console. You can also import locations using the Devices Import action.
To create a location:
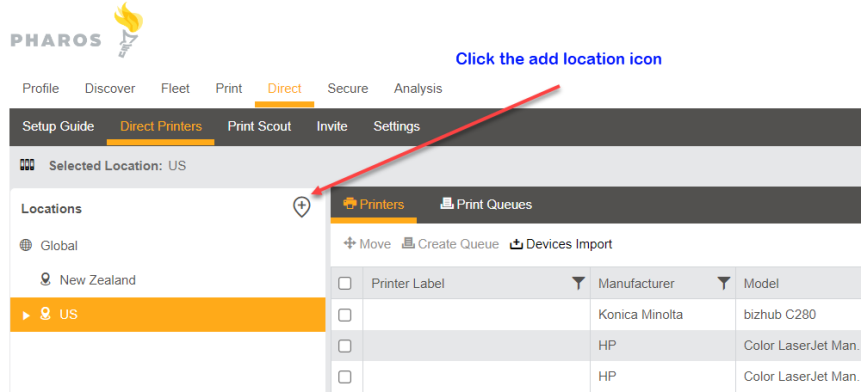
1. Navigate to the Direct > Direct Printers tab in the Pharos Cloud web console.
2. In the Locations pane on the left, click the  button to create a new location.
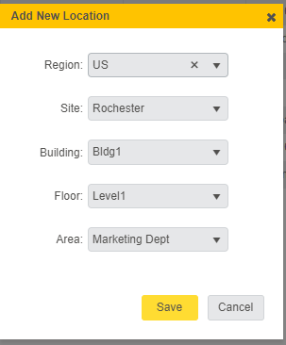
3. This opens the Add New Location dialog box. Enter the location details as you see fit.
4. Click Save. You will see the location tree on the left hand side of the Direct Printers tab.
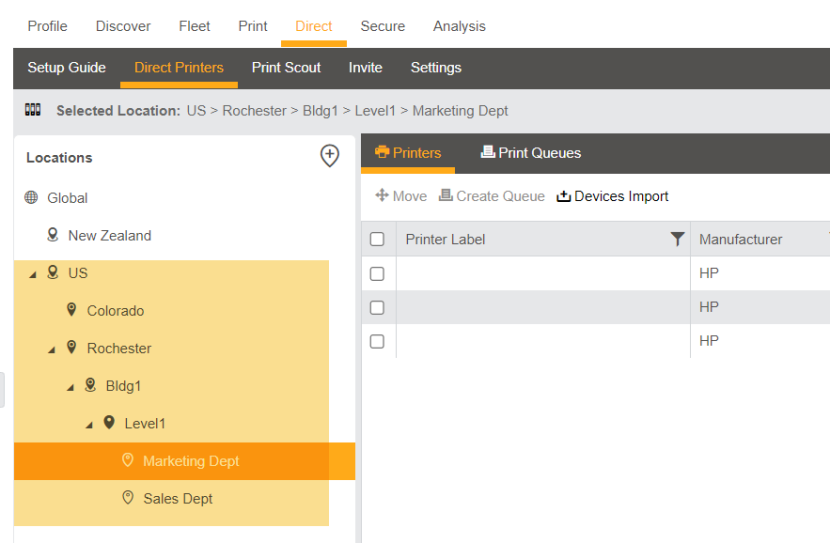
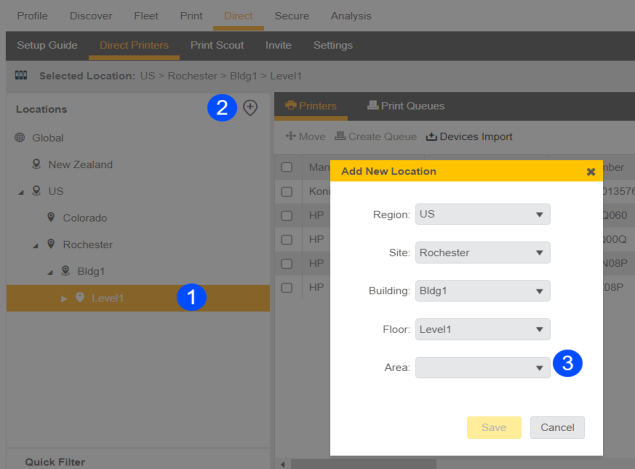
Add one or more child locations if required. To do this, you can select the location you want to make child locations under and then click the + button.
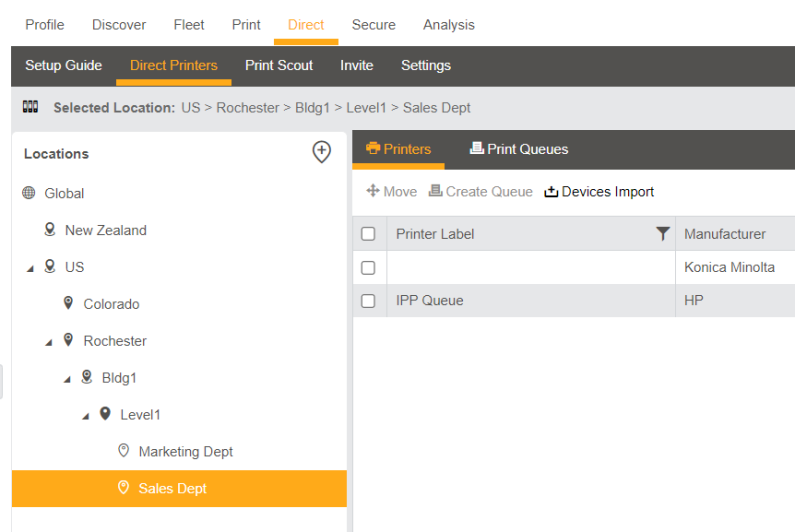
The following example adds Sales Dept under Level 1. Select Level 1 from the location tree, click the + button (next to Locations), and then in the dialog box that appears, add the Sales Dept and click Save.
The following shows that the
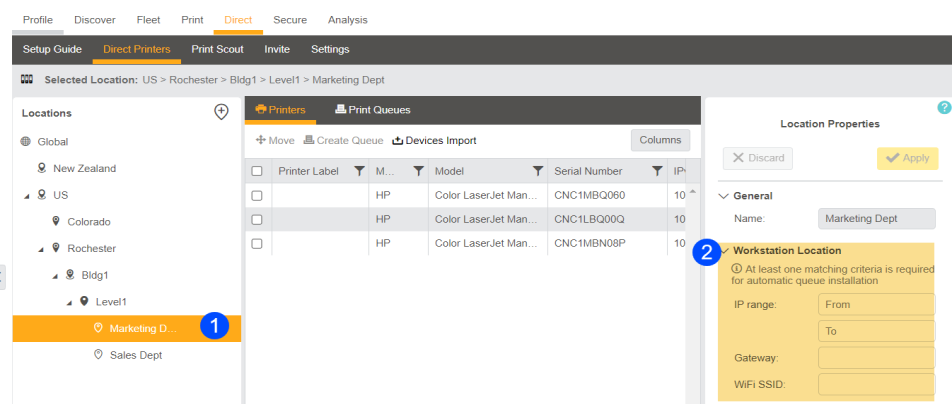
4. (Optional) Configure the Workstation Location. In this step, you will associate network information with a given location.
Note: Configure the workstation location only if you want to have auto-install printers in your organization.
To configure the workstation location:
- Select the location where you want to define the network information.
- Enter any of the following network information.
- IP Range
- Gateway
- Wi-Fi SSID
Step 2: Assign Printers to Locations
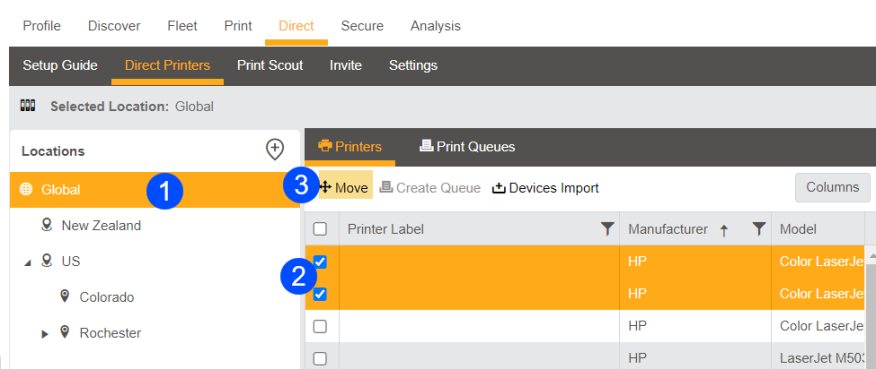
The Global location includes a list of all the printers discovered by Device Scout or manually imported via the Devices Import operation. In this step, you will be assigning printers to the locations you’ve created.
To assign printers to a location
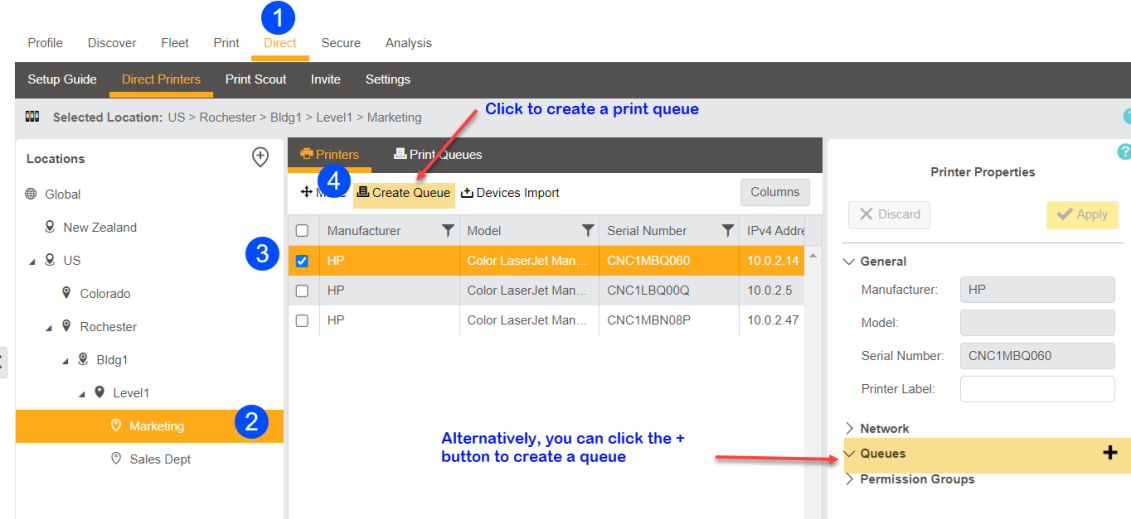
1. In the Locations tree, select Global.
2. Select one or more printers to assign to the relevant location.
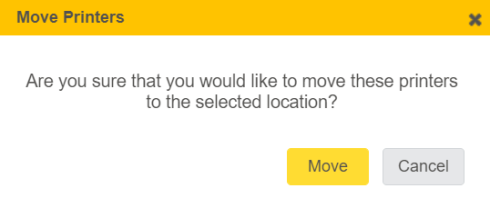
3. Click the Move button.
4. In the dialog that appears, select the location where you want to assign the selected printers and then click Yes.
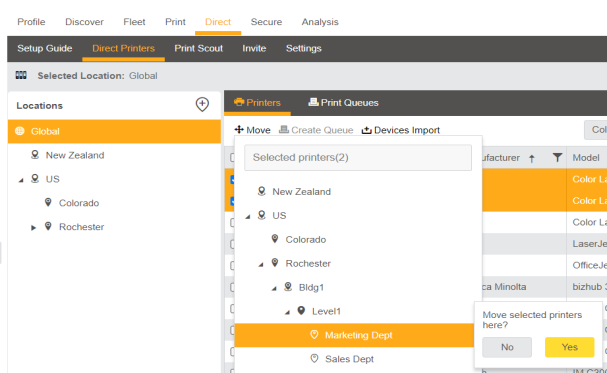
5. In the confirmation dialog, select Move.
Step 3: Create Print Queues
1. Navigate to the Direct > Direct Printers tab.
2. Select the location where you want to create a print queue.
3. Select the printer in which you want to create an associated print queue.
4. Click the Create Queue button or you can click the + button on the right-hand side (next to the Queues property) as shown in the image below.
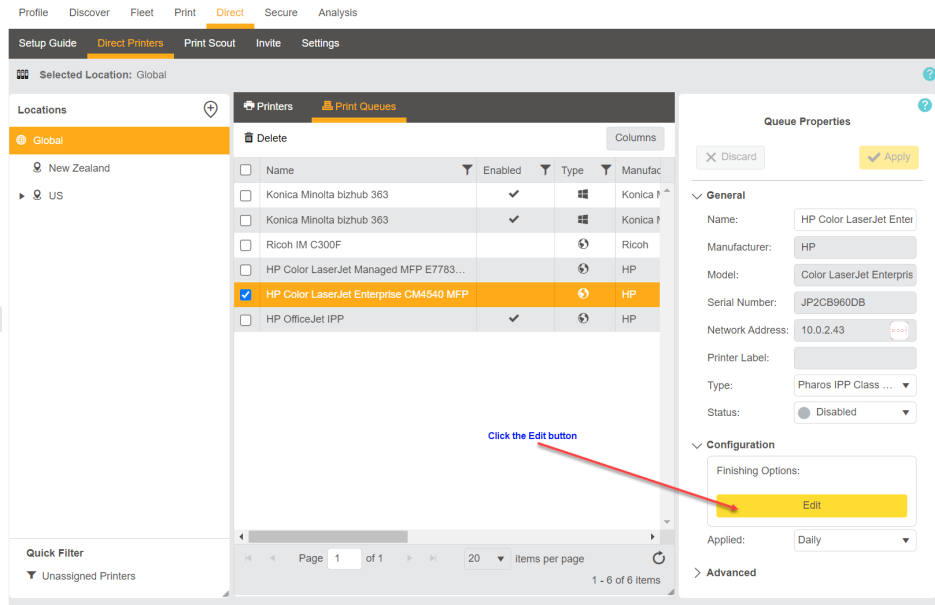
5. Select the Print Queues tab and then configure the print queue properties.
Notes:
- The print queue Type is set to Pharos IPP Class Driver by default if the printer is IPP capable (Ipp Support is set to true). If a printer is not IPP capable, the type will be set to Manufacturer’s Driver for Windows by default.
- The configuration settings vary depending on the print queue Type. For example, if the Print Queue Type is set to Pharos IPP Class Driver, you’ll see Pharos IPP configuration settings.
- The print queue Status is set to Disabled by default. For queues to work, you’ll need to set it to either Manual-install or Auto-install.
The following properties can be viewed and/or configured for Queues. Properties are organized into categories:
General
| Property | Description |
|---|---|
| Name |
The name used to identify the print queue (i.e., the direct printer). This is the name that users see when they print their document from their user workstations and in the Pharos Print desktop app. By default, the queue name is created based on the following, but you can modify it if you want to.
Tip: Use a naming convention that will help users identify the finishing options that a printer supports (For example, HP LaserJet M5035 MFP-TwoSidedColor, HP LaserJet M5035 MFP-OneSidedMono). |
| Type |
Select the type of print driver for the queue. The options are:
Note: The print queue Type is set to Pharos IPP Class Driver by default if the printer is IPP capable (IPP Support field is set to true). |
| Status |
Set the Status of the print queue:
|
Configuration
| Property | Description |
|---|---|
| Driver |
Select the printer driver to use. When creating a Windows-based direct printer in the Pharos Cloud web console, you will need to configure the appropriate print driver from the list of drivers. This must match the PDL of the printer device associated with the queue (e.g., For HP printers, use HP Universal print drivers). Note: The Driver field is available for Windows print queues only. |
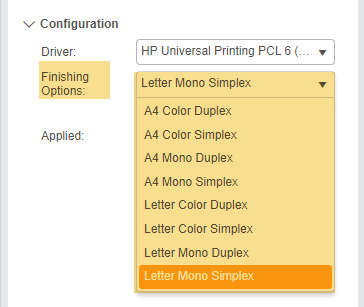
| Finishing Options |
Note: If no finishing options are selected for an IPP queue, the defaults finishing options are Letter, Mono, and Simplex. |
| Applied |
This setting controls how and when updates to the finishing options and print drivers are applied to the print queues installed on user workstations.
Note: If the queue is set to Auto-install and the Applied option is set to New install only, when the customer changes any settings on the queue (for example, different finishing options choice, or queue name change, etc) then the queue will still be updated on the Print Scout, but it will be a one-off, it won't get the settings re-applied every night.
|
Advanced
| Property | Description |
|---|---|
| Ipp Url |
A read-only value of the associated printer’s IPP URL. This value uses the Ipp Url if available. If Ipp Url is not available, it uses the Discovered Ipp Url. |
Related Topics: