End-User Portal
Overview
The End-User Portal provides a convenient way for users to manage their documents and their passcodes. It also eliminates the requirement for users to install a Print Scout to configure their passcodes.
End-users can perform the following actions through the portal:
- Access the portal by using their OpenID email address.
- Manage documents
- View documents in the queue including documents submitted from the Print Scout, Chrome Extension, Mobile App, or Microsoft Universal Print
- Upload documents
- Update finishing options before uploading documents
- Delete documents (single or multiple documents)
- Manage passcode
- Generate passcode
- Reset passcode
- Change active account
Key Features
- Provides a true cloud experience by eliminating the need to install the Print Scout on user workstations for passcode management.
- Users can conveniently manage their documents and passcode from any operating system using any web browser.
- Easy to set up. The administrator simply needs to send users a link to the end-user portal.
- Documents are securely transferred and stored in the cloud.
Enable End-User Portal
To enable the user portal, toggle the "Enable User Portal for End-Users" option in the Secure > Settings tab. Once activated, a link to the user portal will be displayed, which an administrator can share with users to grant them access to the portal.
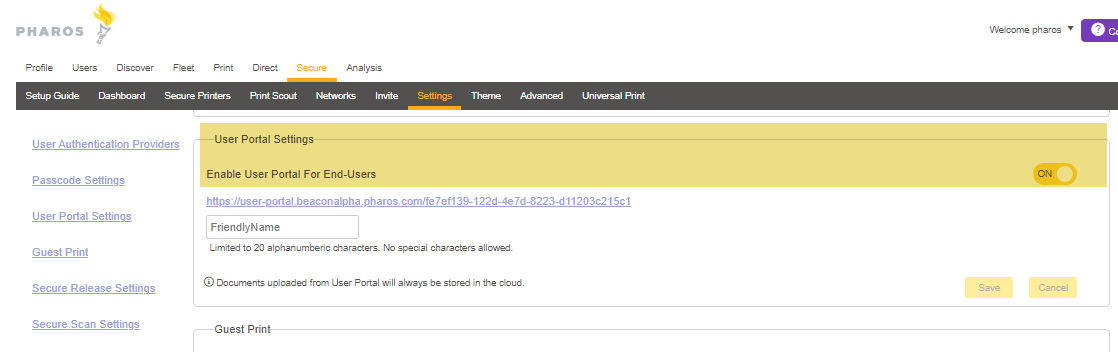
Note: The User Portal Settings section is available for sites with OpenID authentication only.
Adding a Friendly Name
Administrators have the capability to assign a friendly name to a URL using the "FriendlyName" field. This feature enables administrators to enter a more descriptive name, replacing the default GUID typically associated with the URL. Such customization enhances the readability and overall user experience of the URL.
Notes:
-
The Friendly Name is limited to 20 alphanumeric characters.
-
Only users with System Administrator and IT Administrator roles can configure the Friendly Name for the User Portal.
-
Friendly Names cannot contain special characters; only alphanumeric characters are allowed.
User Portal Workflow
1. The IT administrator distributes the User Portal link to users.
Note: An email invitation template is not available for the User portal.
2. The user logs into the End-User Portal.
- New users: Users sign in using their OpenID email address. If it is their initial sign-in, the user's email address will be registered with Pharos Cloud, and they will be prompted to generate a passcode. The passcode will be sent to the user's email address for future reference.
- Existing users: Existing users don’t need to generate a new passcode.
3. The new user generates a passcode.
4. The user can go back to the My Printing page to view, delete, or upload documents.
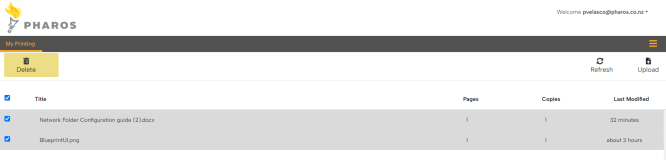
Document Management
The User Portal enables users to manage their jobs without a Print Scout. Using the portal, users can conveniently view, upload, or delete their jobs.
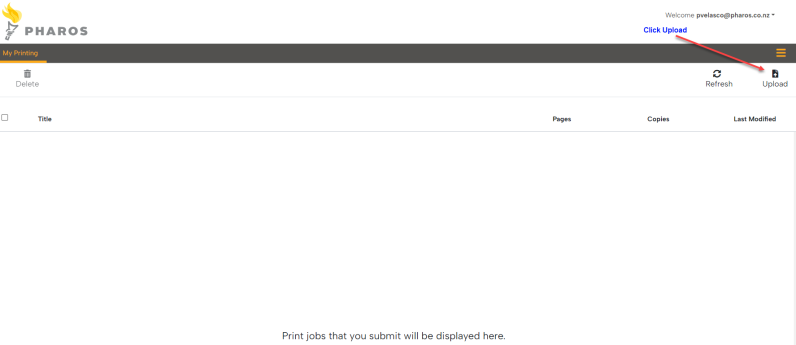
Uploading documents
There are two ways users can upload documents to the End-User Portal:
- By clicking the Upload button.
- By dragging and dropping files from the browser to the user portal.
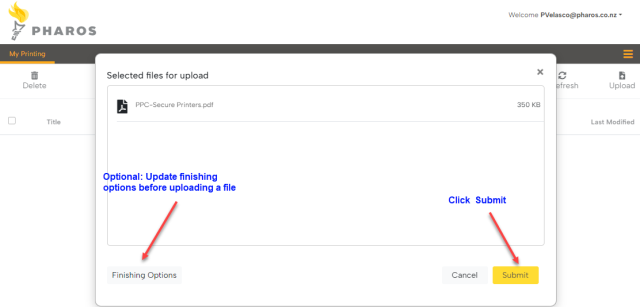
Browse to the location of the document you wish to upload.
Optional: If you want to modify the print options (e.g., Color, Duplex, Letter), click the Finishing Options button.
To upload the document, click on the Submit button.
To release documents, users will need to walk up to a secure printer and use the generated passcode to release the document. Users can also release jobs by swiping their proximity cards.
Supported File Formats for Upload
The End-User Portal supports uploading documents with the following file formats:
- JPEG
- BMP
- PNG
- TXT
- Microsoft Office (doc, docx, xls, xlsx, ppt, pptx)
The maximum file size allowed for the User Portal is as follows:
Web browser
- TXT: 10 MB
- JPEG, BMP, PNG: 50MB
- MS Office docs: 60 MB
- PDF: Up to 250 MB
Mobile app
- PDF: 60 MB
- MS Office docs: 60 MB
Notes and Limitations:
- Uploading documents from a mobile device supports PDF and Microsoft .docx file formats only. Images and text file formats are not supported.
- Documents uploaded through the End-User Portal are stored in the cloud.
- For on-premises sites that do not use Cloud Connector, the document names of print jobs submitted through the Print Scout are displayed on the User Portal in an encrypted format.
Deleting documents
To delete documents using the user portal, select the file(s) you want to delete, and then click on the Delete button.
Passcode Management
Passcode authentication is an alternative way to authenticate at a printer. If an employee ID card is lost, damaged, or unavailable, the employee can use a passcode to authenticate at a printer to release documents.
There are two ways users can obtain a passcode to use for authentication:
- Through the registration of OpenID credentials via the Pharos Print Setup Guide, which is installed by the Print Scout.
- Through the end-user portal. This is suitable for sites who do not have Print Scouts installed on user workstations.
The passcodes obtained from the End-User Portal serve the following purposes:
- Identifying or authenticating oneself at the printer.
- Registering proximity cards using the passcode.
Note: Passcodes generated via the user portal cannot be recovered from the Pharos Secure Release Setup Guide or the mobile app. Passcodes will only be visible during their creation. After that, passcodes will not be visible anywhere else. If users forget their passcodes, they have the option to reset it through the Print Scout Setup Guide and the End-User portal. They can also refer to the email that was sent to them.
Generating a Passcode
Users can use the end-user portal to generate a passcode. hey need to sign in to the end-user portal using their OpenID email address. If it's their first sign-in, the user's email address will be registered, and they will be prompted to generate a passcode. This passcode will be sent to the user's email address for future reference.
To generate a passcode:
1. Click on the link to the user portal provided by the IT administrator.
2. Sign in to the user portal using your OpenID email address.
3. If it's your initial sign-in, you will be prompted to generate a passcode.
4. To generate the passcode, click on the Menu icon located on the right-hand side of the user portal, and the option "Generate Passcode" appears. Clicking on the Generate Passcode button initiates the process.
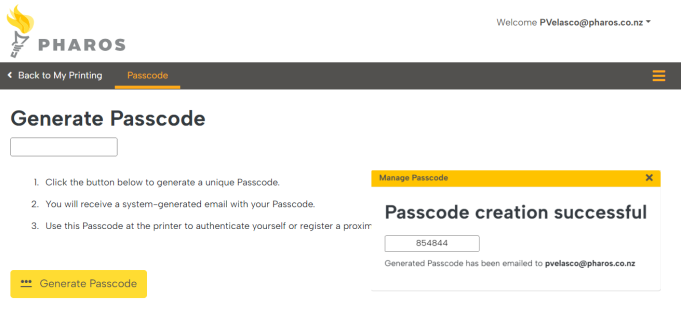
5. Once the passcode is created successfully, you will receive a confirmation message (Passcode creation successful).
You will receive an mail containing the passcode for future reference.
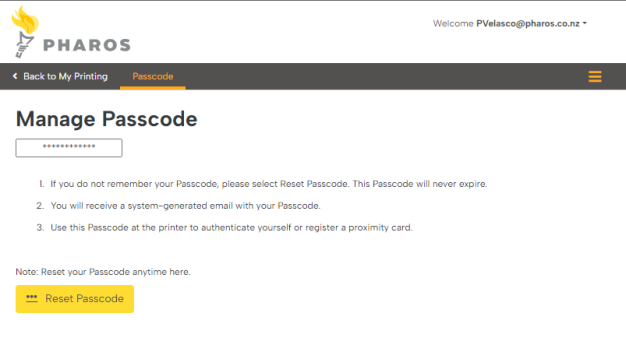
Resetting a passcode
To reset your passcode using the user portal, follow these steps.
1. Sign in to the user portal if not already signed in.
2. Click on the Menu icon located on the right-hand side of the user portal and then select Passcode.
3. The Manage Passcode screen will appear. Click on the Reset Passcode button to proceed with the reset.
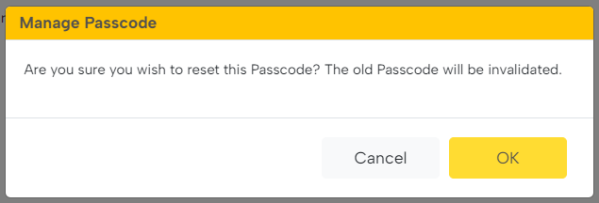
4. A confirmation message appears. Click OK to confirm the passcode reset, noting that your old passcode will be invalidated.
Managing Active Accounts
An Active Account is the account to which print jobs are charged. When a user has multiple accounts, print jobs are typically charged to the active account, which is usually the account most recently used by the user.
Note: The initial active account is the first one listed alphabetically in the web console. For example, if you have two accounts named "Library" and "Science," the initial active account will be "Library."
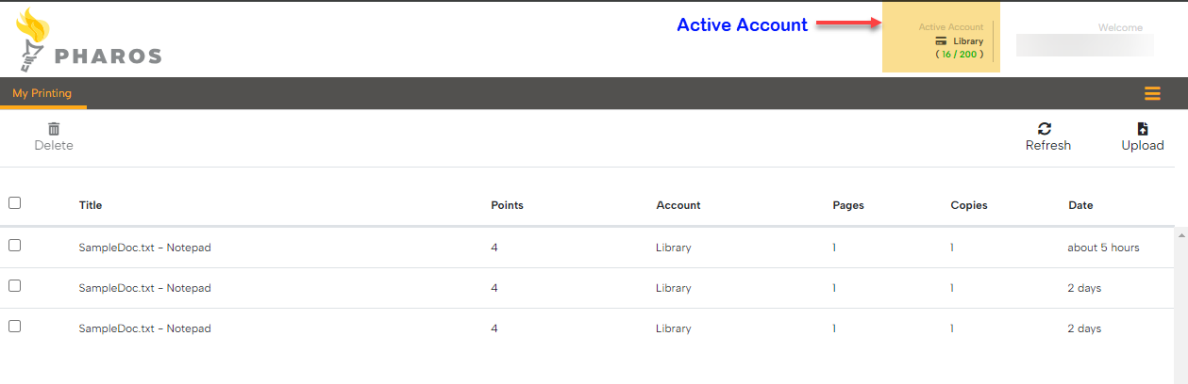
Viewing an Active Account
Open the User Portal. The active account is displayed next to the login account.
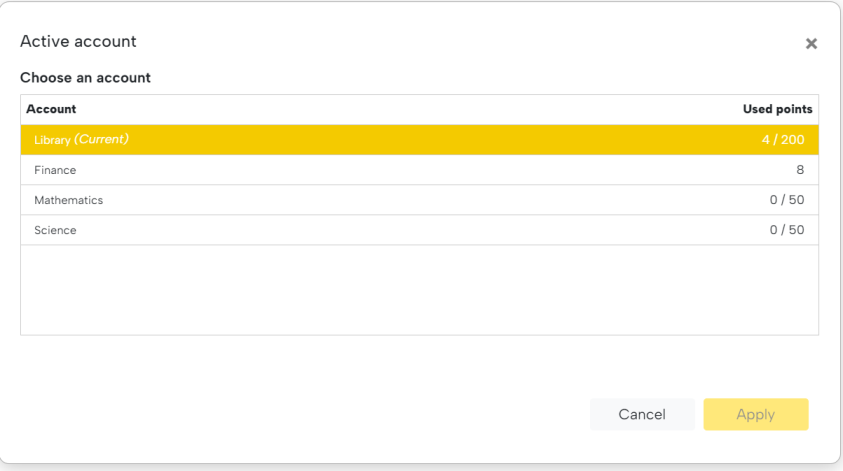
Changing Active Account
Users can change the account for a job through the User Portal. Clicking on Change Account opens the User Portal, and lets users change the active account.
Color-Coded Account Balance Display
The account's effective balance is shown with a color-coded system. The color changes to reflect the status of the balance, such as whether it's sufficient, low, or critically low. This visual cue helps users quickly determine the account's status and take action if necessary.
-
Soft Limit Exceeded (Red Bold): If the account balance exceeds the set soft limit, it will be displayed in bold red. For example, if the soft limit is 100 and the balance is 110, it will show as 110/100 in red bold text.
-
75% of Soft Limit (Orange Bold): When the account balance reaches 75% of the soft limit, it will be displayed in bold orange. For example, if the soft limit is 100 and the balance is 90, it will show as 90/100 in orange bold text.
-
Below 75% of Soft Limit (Green): If the account balance is below 75% of the soft limit, it will be displayed in green. For example, if the soft limit is 100 and the balance is 50, it will show as 50/100 in green text.
Changing the User Portal Logo/Favicon Logo
Administrators can modify both the logo image and the favicon image through the Secure > Theme tab section of the web console.
-
Navigate to the Secure > Theme tab on the web console.
-
In the User Portal section select Logo Image or Favicon Image.
-
Click the Upload button. In the browser window that opens, select the image that you want to replace the original image with.
-
Click Save Changes.
Note: The recommended maximum size for the Logo Image is 240x70 pixels. For the Favicon image, the recommended size is 96x96 pixels.
Related Topics